

Single sign-on is a paid add-on. Please contact support to enable it for your organization.
Supported identity providers
Xata connects to identity providers over OpenID Connect (OIDC):- Google Workspace: members sign in with their Workspace account. Google restricts sign-in to your domain.
- Microsoft Entra ID: members sign in with their Entra account, restricted to your own tenant.
- OpenID Connect: any provider that publishes an OpenID Connect discovery document, such as Okta or Auth0.
How it works
SSO is configured per email domain. Each domain goes through three steps:- Verify the domain. Publish a DNS TXT record to prove your organization controls it.
- Connect an identity provider. Register Xata with your provider and enter the credentials it issues.
- Require SSO. Turn on enforcement so every account on the domain signs in through your provider.
Step 1: Verify your domain
- Under Add an email domain, enter the domain your members’ email addresses end in, for example
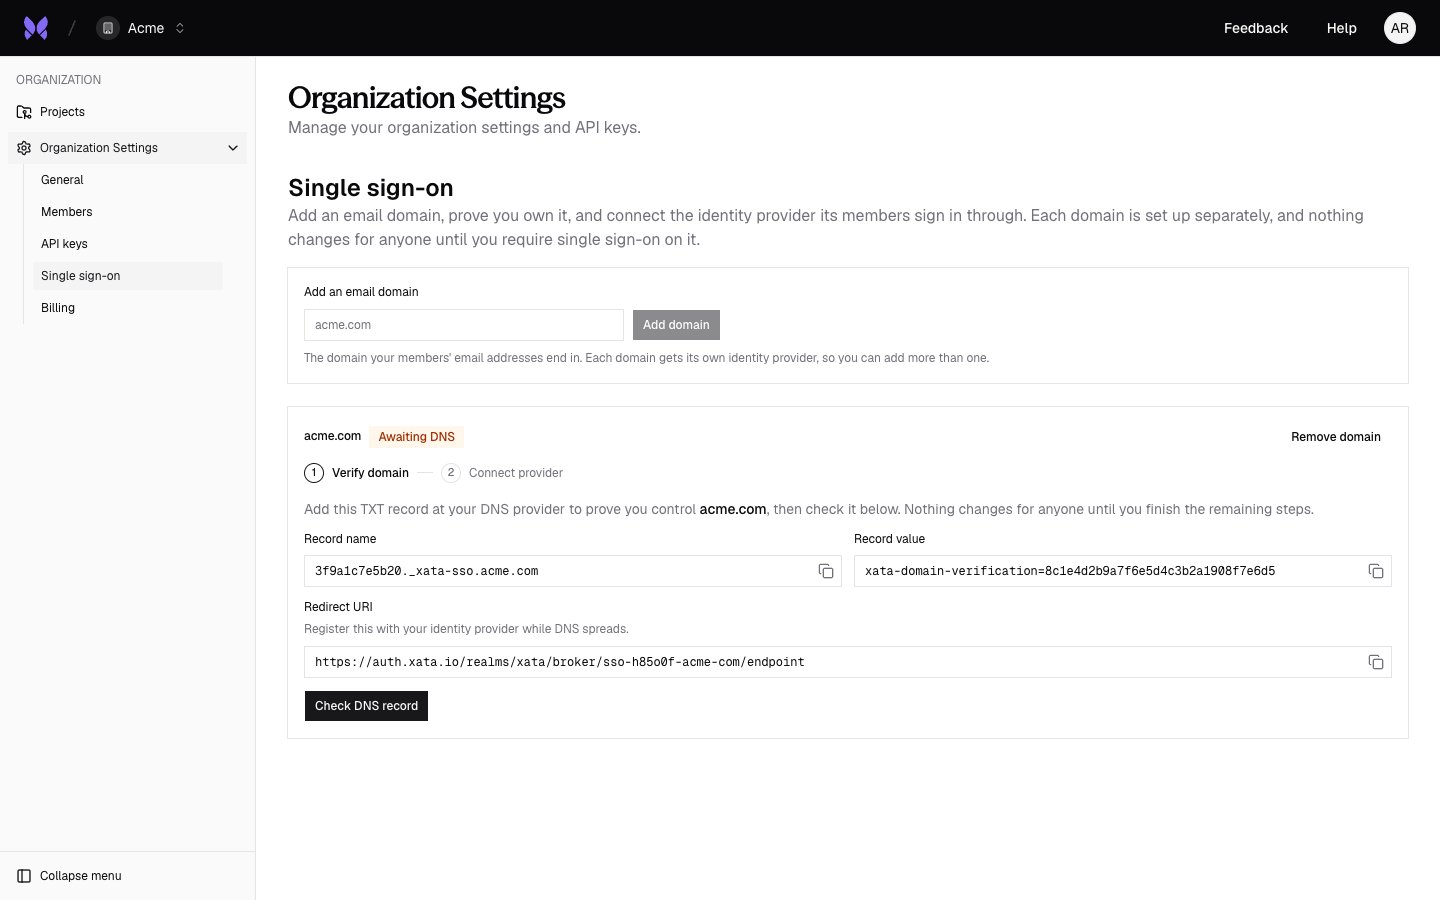
acme.com, and select Add domain. - Xata shows a TXT record for the domain. Add it at your DNS provider exactly as shown:
- Record name:
<label>._xata-sso.<your domain>, for example3f9a1c0d7e2b._xata-sso.acme.com - Record type:
TXT - Record value:
xata-domain-verification=<value>
- Record name:
- Select Check DNS record. DNS changes can take up to a few hours to spread, so if the record is not found yet, check again later.
*.acme.com are not accepted. If your members use addresses on eu.acme.com as well as acme.com, add both domains.
Step 2: Connect your identity provider
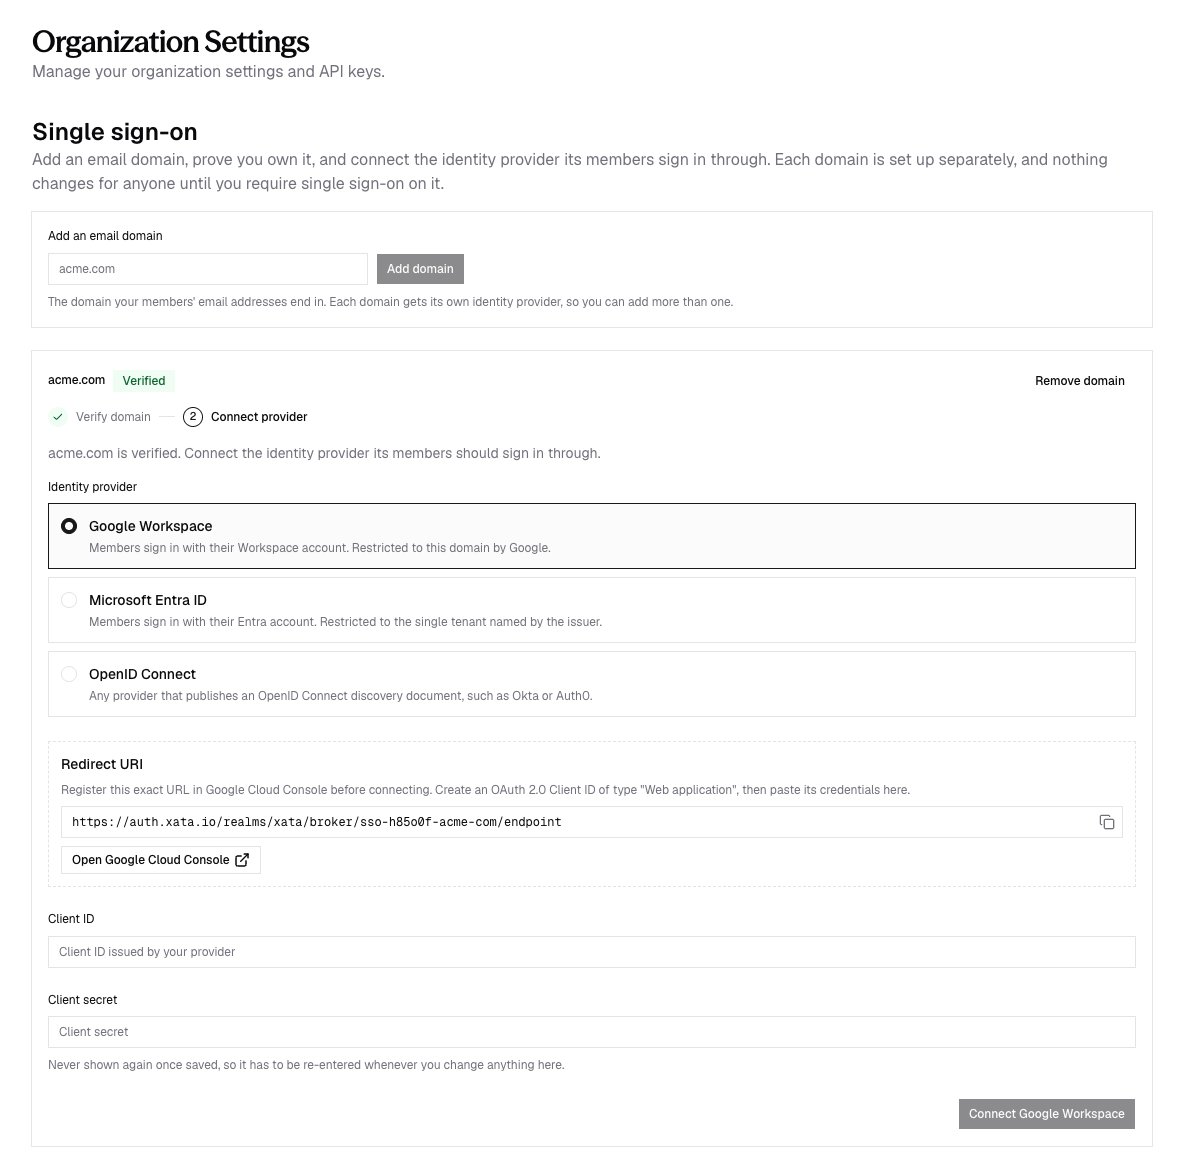
The domain card shows a Redirect URI as soon as you add the domain, so you can register it with your identity provider while DNS spreads. It has the form:- Google Workspace
- Microsoft Entra ID
- OpenID Connect
- In the Google Cloud console, create an OAuth 2.0 Client ID of type Web application.
- Add the redirect URI from Xata under Authorized redirect URIs.
- In Xata, select Google Workspace and paste the Client ID and Client secret.
openid, profile and email scopes, plus User.Read for Microsoft Entra ID. The client secret is never shown again once saved. To change any provider setting later, select Edit credentials and enter the secret again.
Before you require SSO, check that a sign-in through the provider works. Once the provider is connected, the domain card shows a Test sign-in link. Open it in a private browser window and sign in with an account on the domain. You land on your account page, which lists the provider under Connected Accounts. If the sign-in fails, check your provider settings and select Edit credentials to fix them.
Step 3: Require SSO
Turn on Require SSO for <domain> on the domain card. The change takes effect immediately, and the domain shows an SSO required badge. If members on the domain cannot sign in afterwards, turn Require SSO for <domain> off again from a window where you are still signed in. Their previous sign-in methods work again straight away.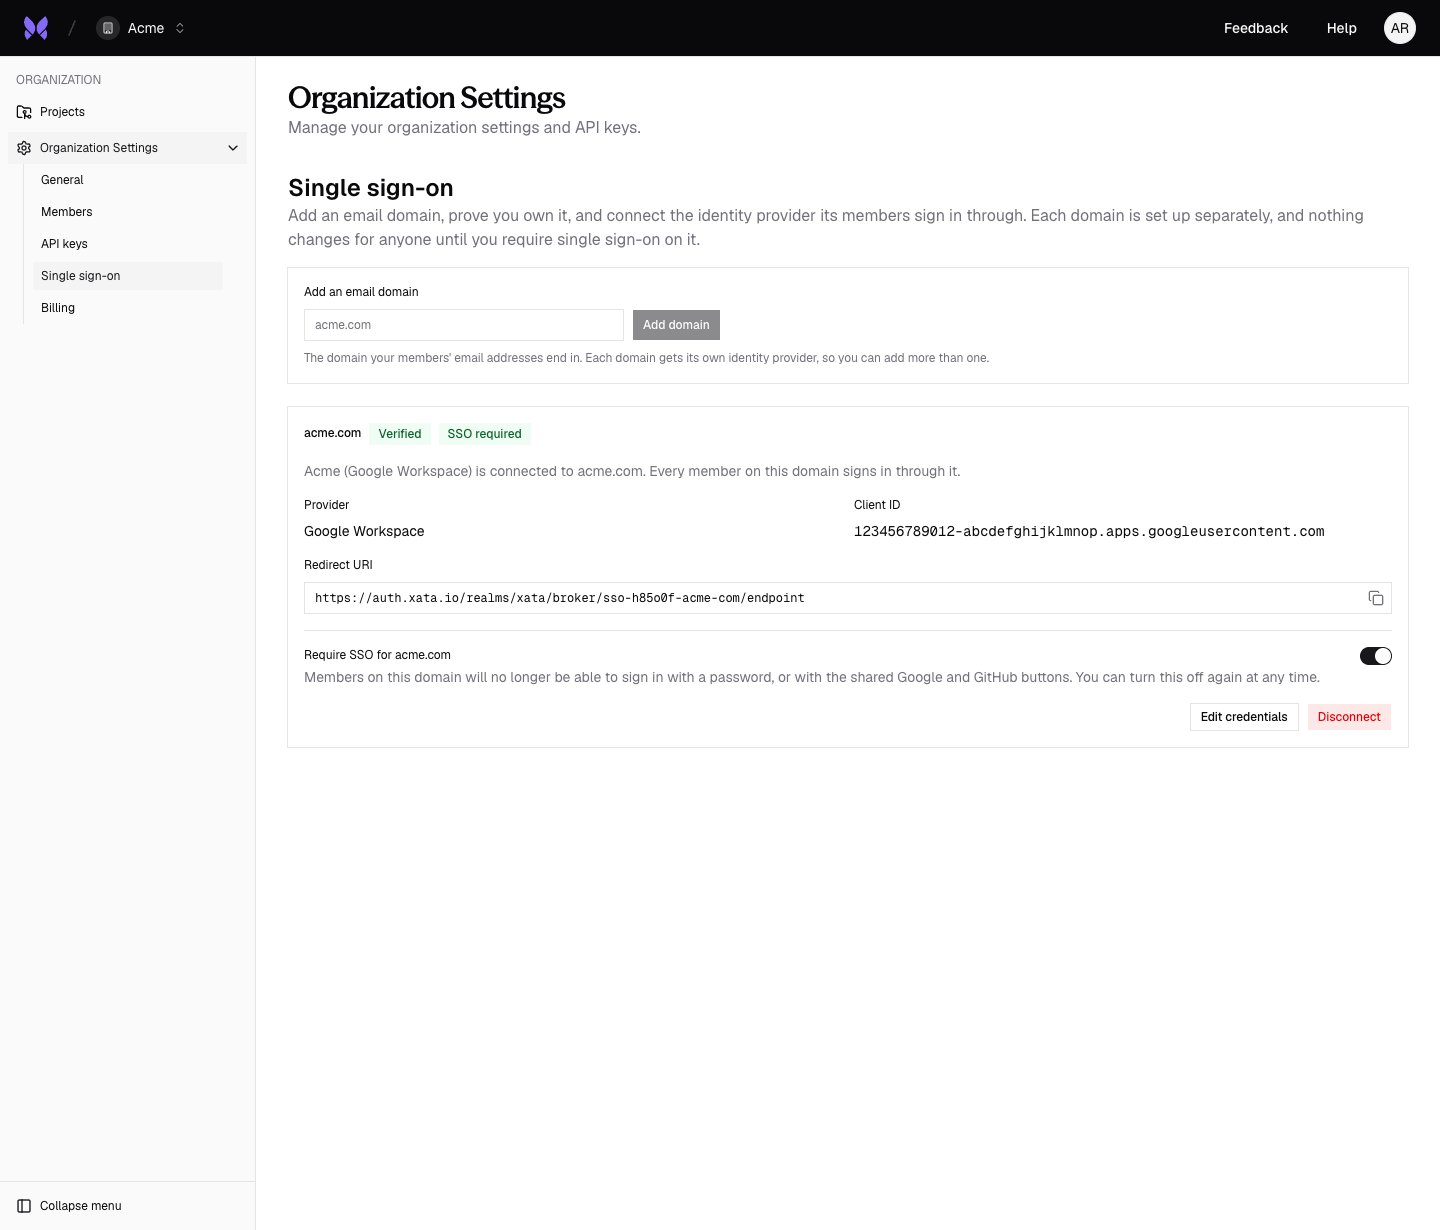
- Signing in with a password redirects to your identity provider.
- The Google and GitHub sign-in buttons redirect to your identity provider.
- Signing up with a password and resetting a password are refused.
Signing in with SSO
Once SSO is required, members enter their work email on the Xata sign-in page and are sent to your identity provider. There is no separate SSO button. The first time someone signs in through your identity provider, they are added to your organization automatically, without an invitation. If they already have a Xata account with the same email address, they are asked to confirm linking it to your identity provider. Your identity provider can only sign in email addresses on its own domain. Multi-factor authentication and other sign-in policies are enforced by your identity provider. Xata does not support SCIM provisioning. Removing someone in your identity provider stops them from signing in again, but does not remove them from your organization or end sessions they already have. Remove departed members from your organization in Xata as well.Remove SSO
- Disconnect removes the identity provider from a domain. SSO is no longer required, and members on the domain sign in with the Google and GitHub buttons or a password, using Forgot Password? if they never set one. The domain stays verified, so you can connect a different provider.
- Remove domain releases the domain from your organization. It is only available once no identity provider is connected to the domain.
Using the CLI
Every step on this page is also available from the CLI underxata organization sso:
providers add prompts for the client secret, or reads it from XATA_SSO_CLIENT_SECRET, so it stays out of your shell history. See the CLI reference for every command and flag.