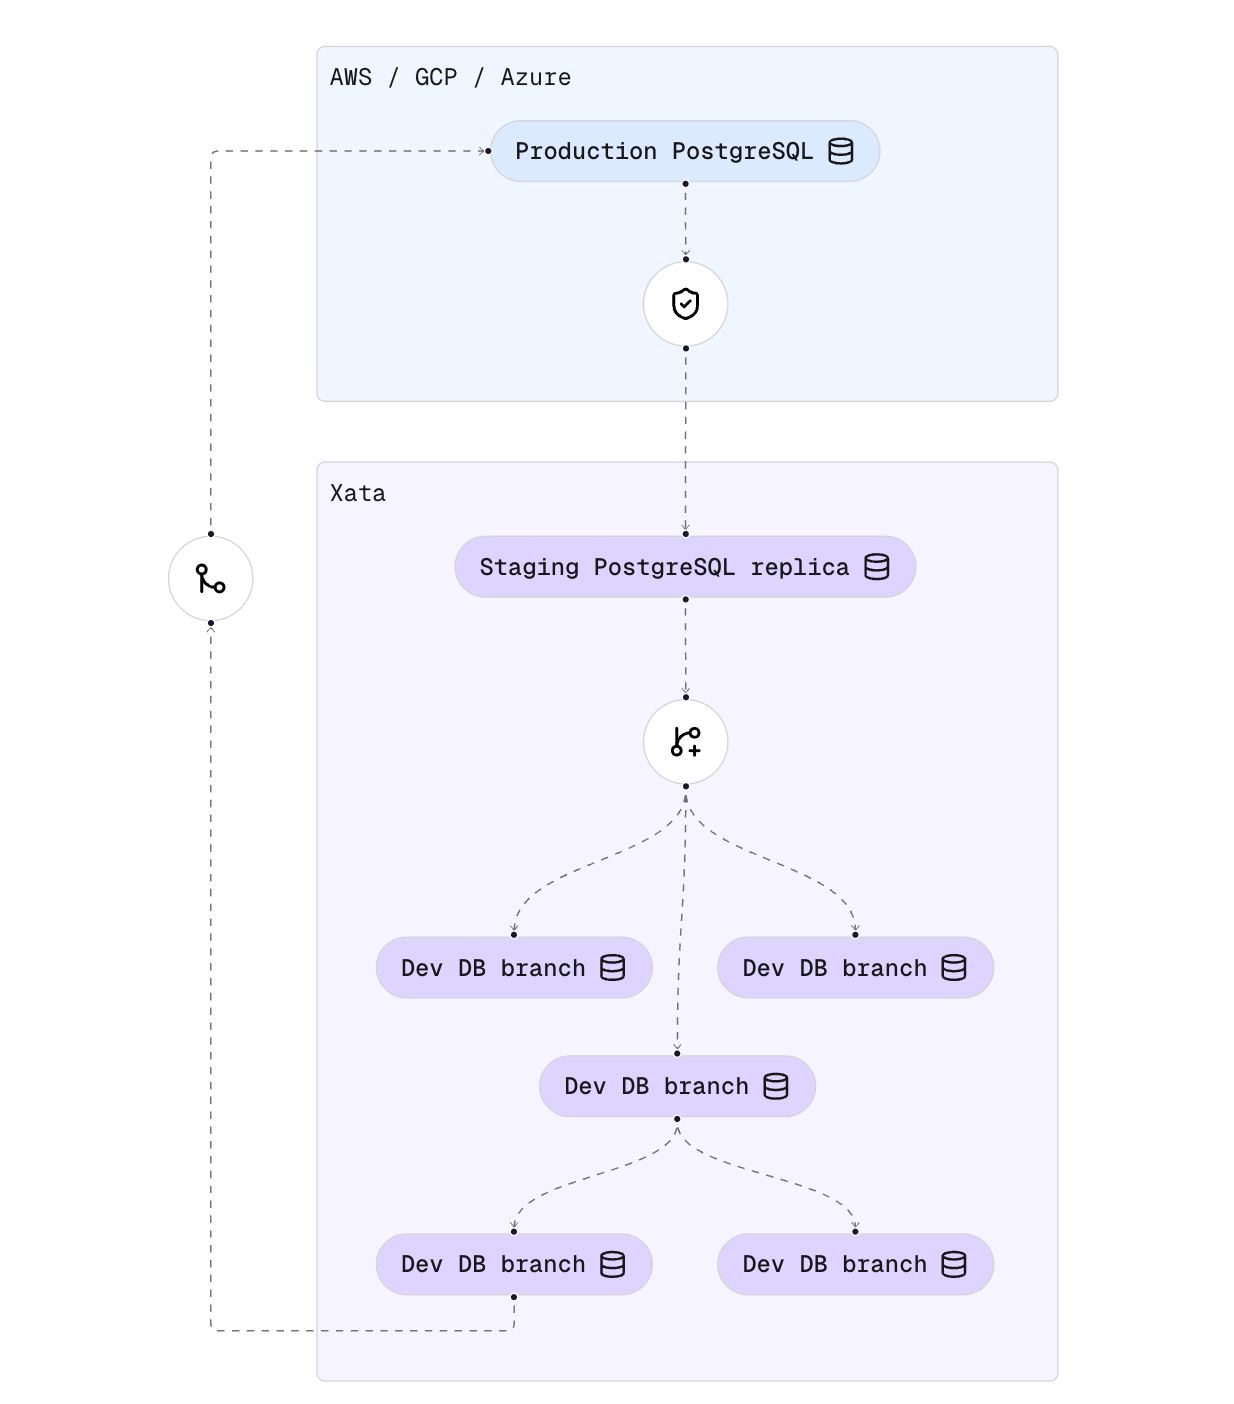
This guide shows you how to create a realistic staging environment in Xata by cloning your production database, optionally anonymizing sensitive data.

1. Prerequisites
- A Xata account (sign up here)
- The Xata CLI installed:
curl -fsSL https://xata.io/install.sh | bash
- Access to your production PostgreSQL database
2. Create a Xata project and branch
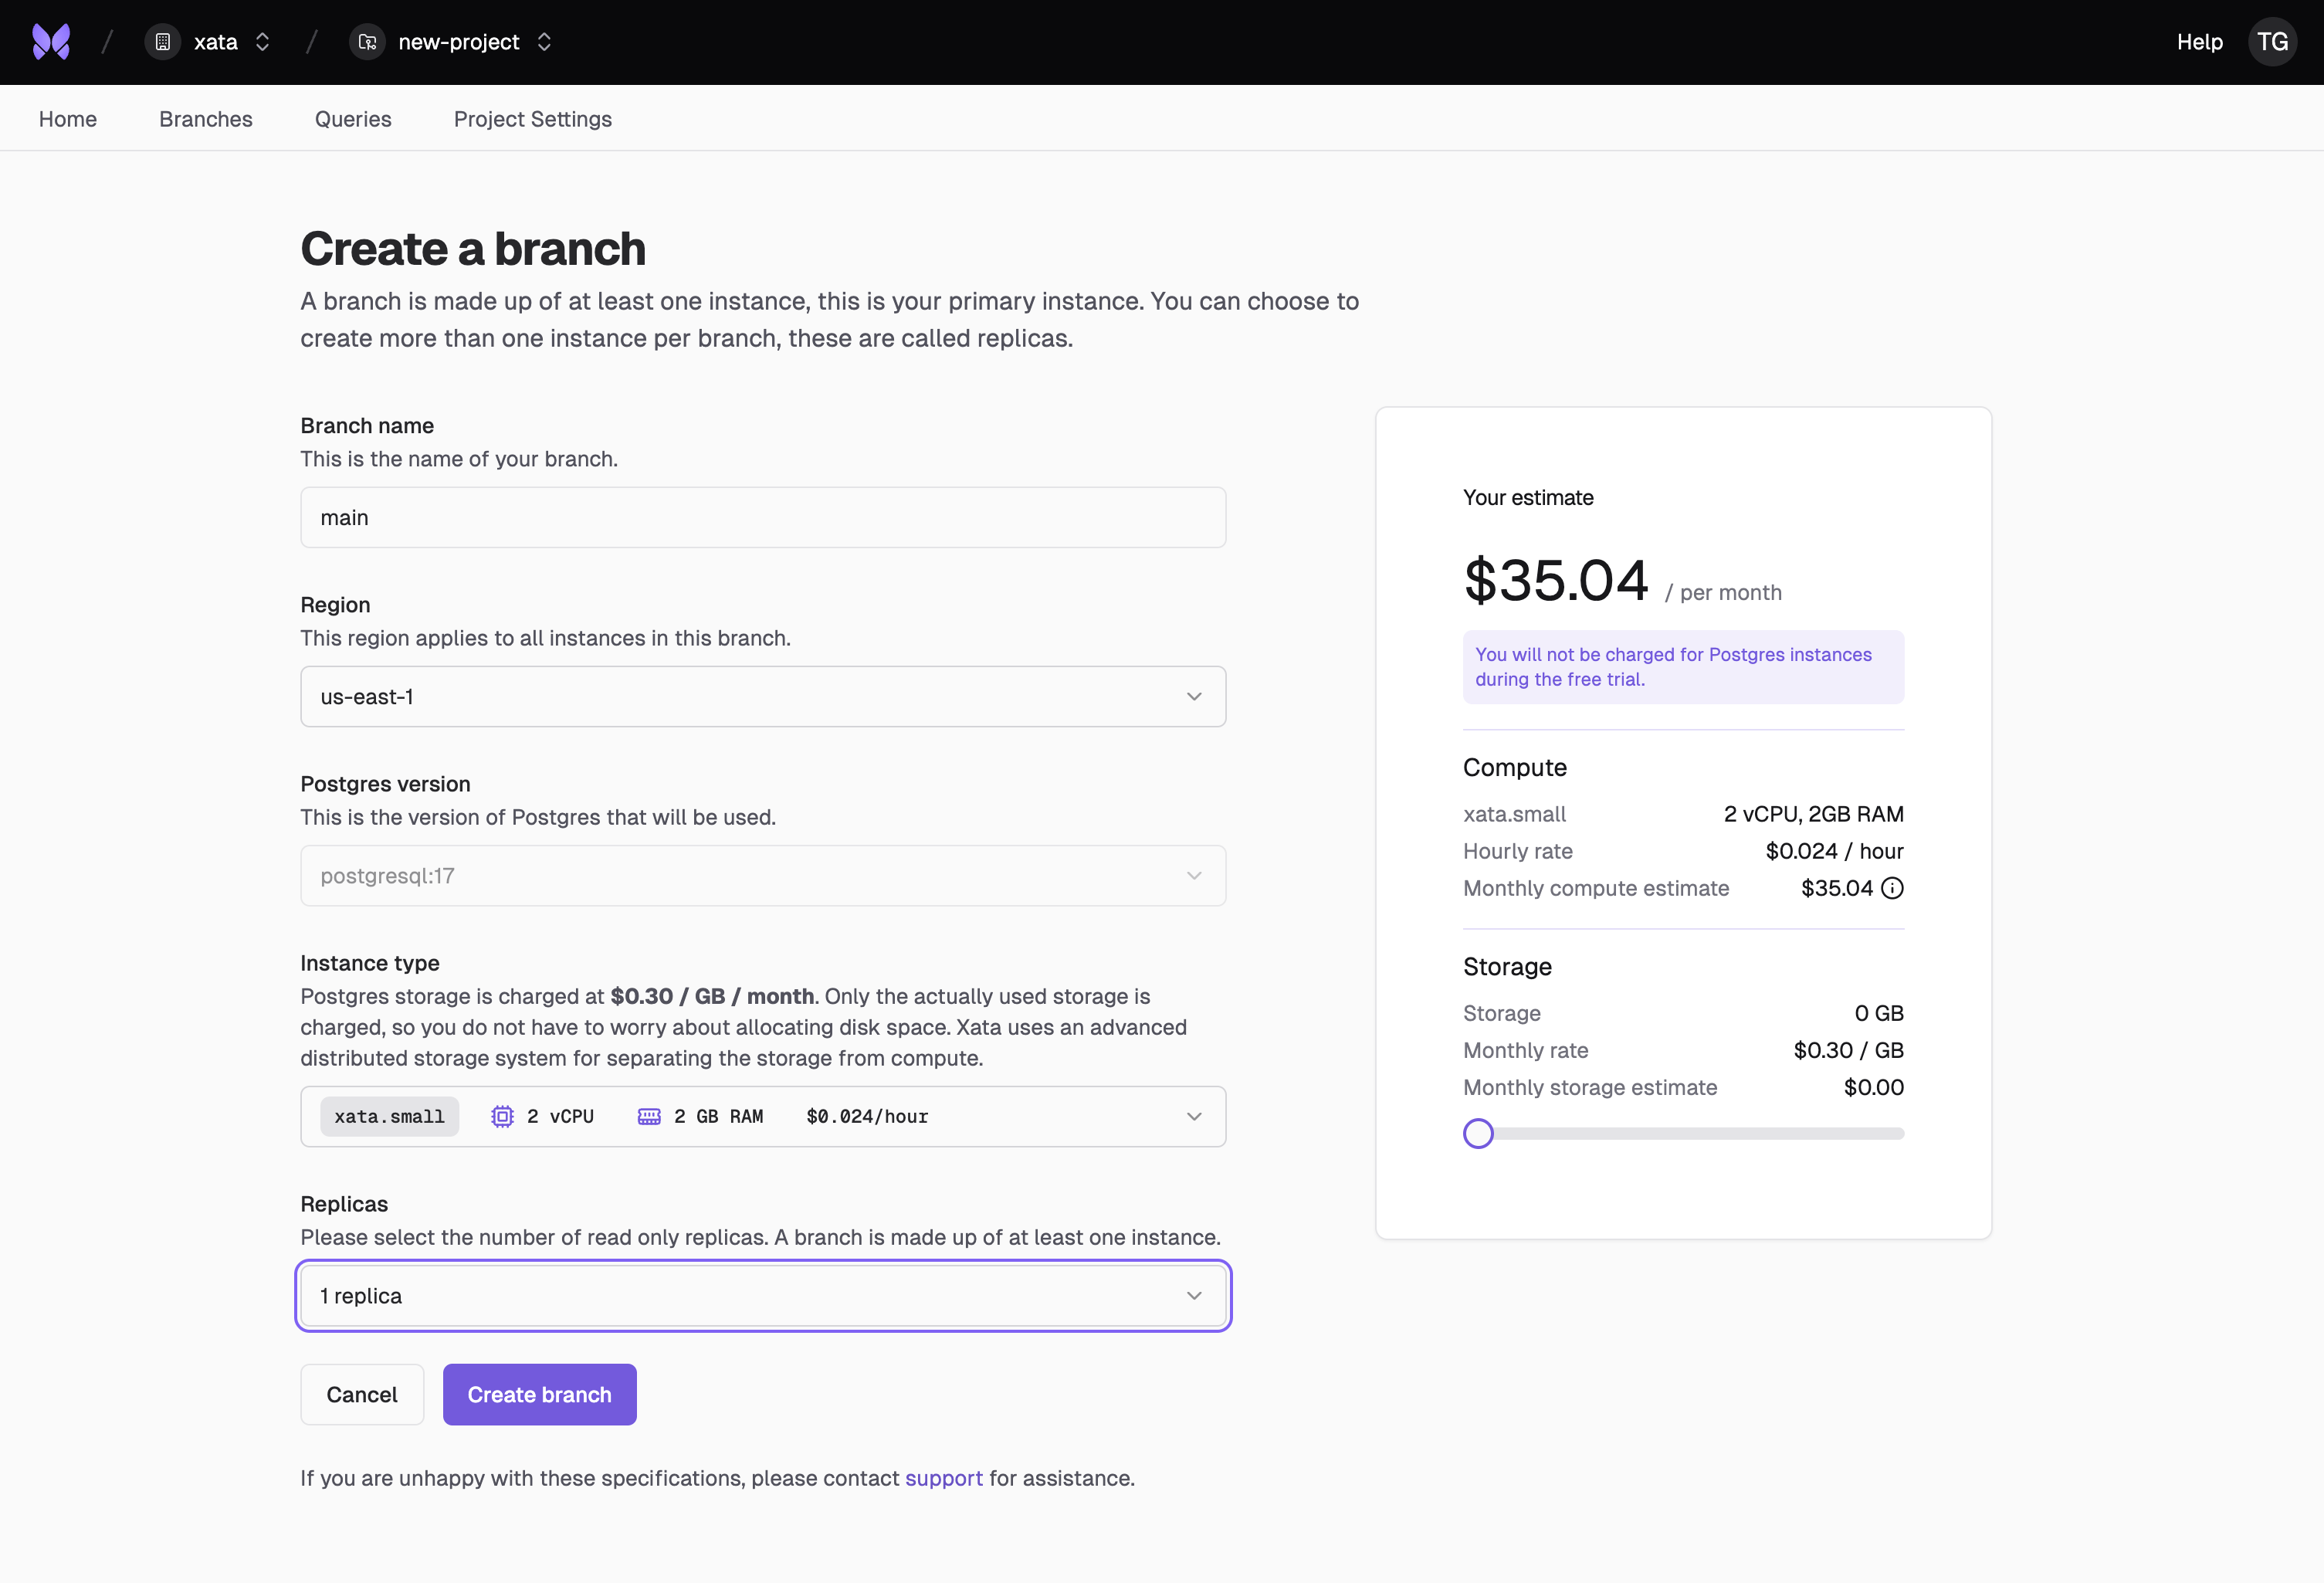
In the Console, create a new project and then click the Create main branch button to create the PostgreSQL instance.
 Since this this is a non-production setup, you can typically select 0 replicas. It is a good idea to start with a similar
instance size as you use for production, but you can also use a smaller instance size if the staging traffic will be much smaller. You can adjust the size later.
If you’re using Xata for production, we recommend creating a separate organization for your staging environment. This allows you to control access to production data more effectively by only granting production access to team members who need it. More granular role-based access control (RBAC) is on our roadmap.
xata init command in your application source directory, or in any directory/repository where you’d like to keep the configuration. It will create a .xata folder with several configuration files.
Follow the instructions from the prompt to select the project and branch that you created at the previous step. Leave the database name set to app.
4. Get the connection string of your current provider
This step depends on your Postgres provider, but keep the following recommendations in mind:
- If your provider offers a read-only endpoint, it is recommended to use that one in order to avoid extra load to your primary instance.
- If your provider offers a “pooler” or “pgbouncer” endpoint, avoid that one, because
xata clone uses a long running transaction.
- The Postgres connection string generally has the form
postgres://user:pass@host:5432/dbname.
First, generate a configuration for the Xata clone process:
xata clone config --source-url $CONN_STRING --mode=prompt
CONN_STRING variable is set to the production connection string from the previous step.
if your Postgres hosting provider uses self-signed certificates, you can disable the strict certificate verification like this:
NODE_TLS_REJECT_UNAUTHORIZED=0 xata clone config --source-url $CONN_STRING --mode=prompt
To simplify the process, the interactive prompt suggests which columns require anonymization. This is based on simple heuristics (name, email, etc.)
.xata/clone.yaml. You can edit this file to further configure your anonymization process.
6. Start the clone
Now, run the clone command to snapshot your production database into Xata:
xata clone start --source-url $CONN_STRING
- The clone process will copy data and apply your anonymization rules to the current (staging) branch.
7. Create a development branch from staging
Now, list your branches to get the staging branch ID:
Grab the staging branch ID from the list and create a new dev branch from staging:
xata branch create --name dev
Summary
- You now have a realistic, anonymized staging environment in Xata.
- You can safely test schema migrations, new indexes, or any other database changes using instant Copy-on-Write branches.
For more details on how to set up an advanced schema changes workflow, see the schema changes section.
To automate this process and keep your staging environment up-to-date, see the scheduled clone documentation. 
