Add feature flags in Astro apps using Xata and Vercel
Follow this tutorial to learn how to implement feature flags in your Astro apps with Xata and Vercel.
Written by
Rishi Raj Jain
Published on
December 12, 2023
In this tutorial, we're going to show you how to incorporate feature flags into your Astro app using Xata and Vercel. Imagine you're working on a feature, and you want to use email addresses to define the controlled rollout of the feature. We'll guide you through setting up these feature flags in Xata, allowing for a controlled rollout of new features. This enables you to gather feedback from a select group of users before launching it more broadly. So, let's get started on enhancing your app's functionality.
In this tutorial, we'll show you how to use feature flags in your Astro app with Xata and Vercel. Imagine you're working on a feature and want to control its release using email addresses. We'll guide you through setting up these feature flags in Xata, allowing for a controlled rollout of new features. This way, you can gather feedback from a select group of users before a broader release. Let's get started:
- You will need a Xata account
- Node.js 18 or later
| Tool | Description |
|---|---|
| Xata | A serverless database platform for data management. |
| Astro | A framework that combines frontend and serverless backend capabilities for building modern web apps. |
| Tailwind CSS | A CSS framework for rapid and responsive styling. |
| Vercel | A cloud platform for deploying and scaling web applications. |
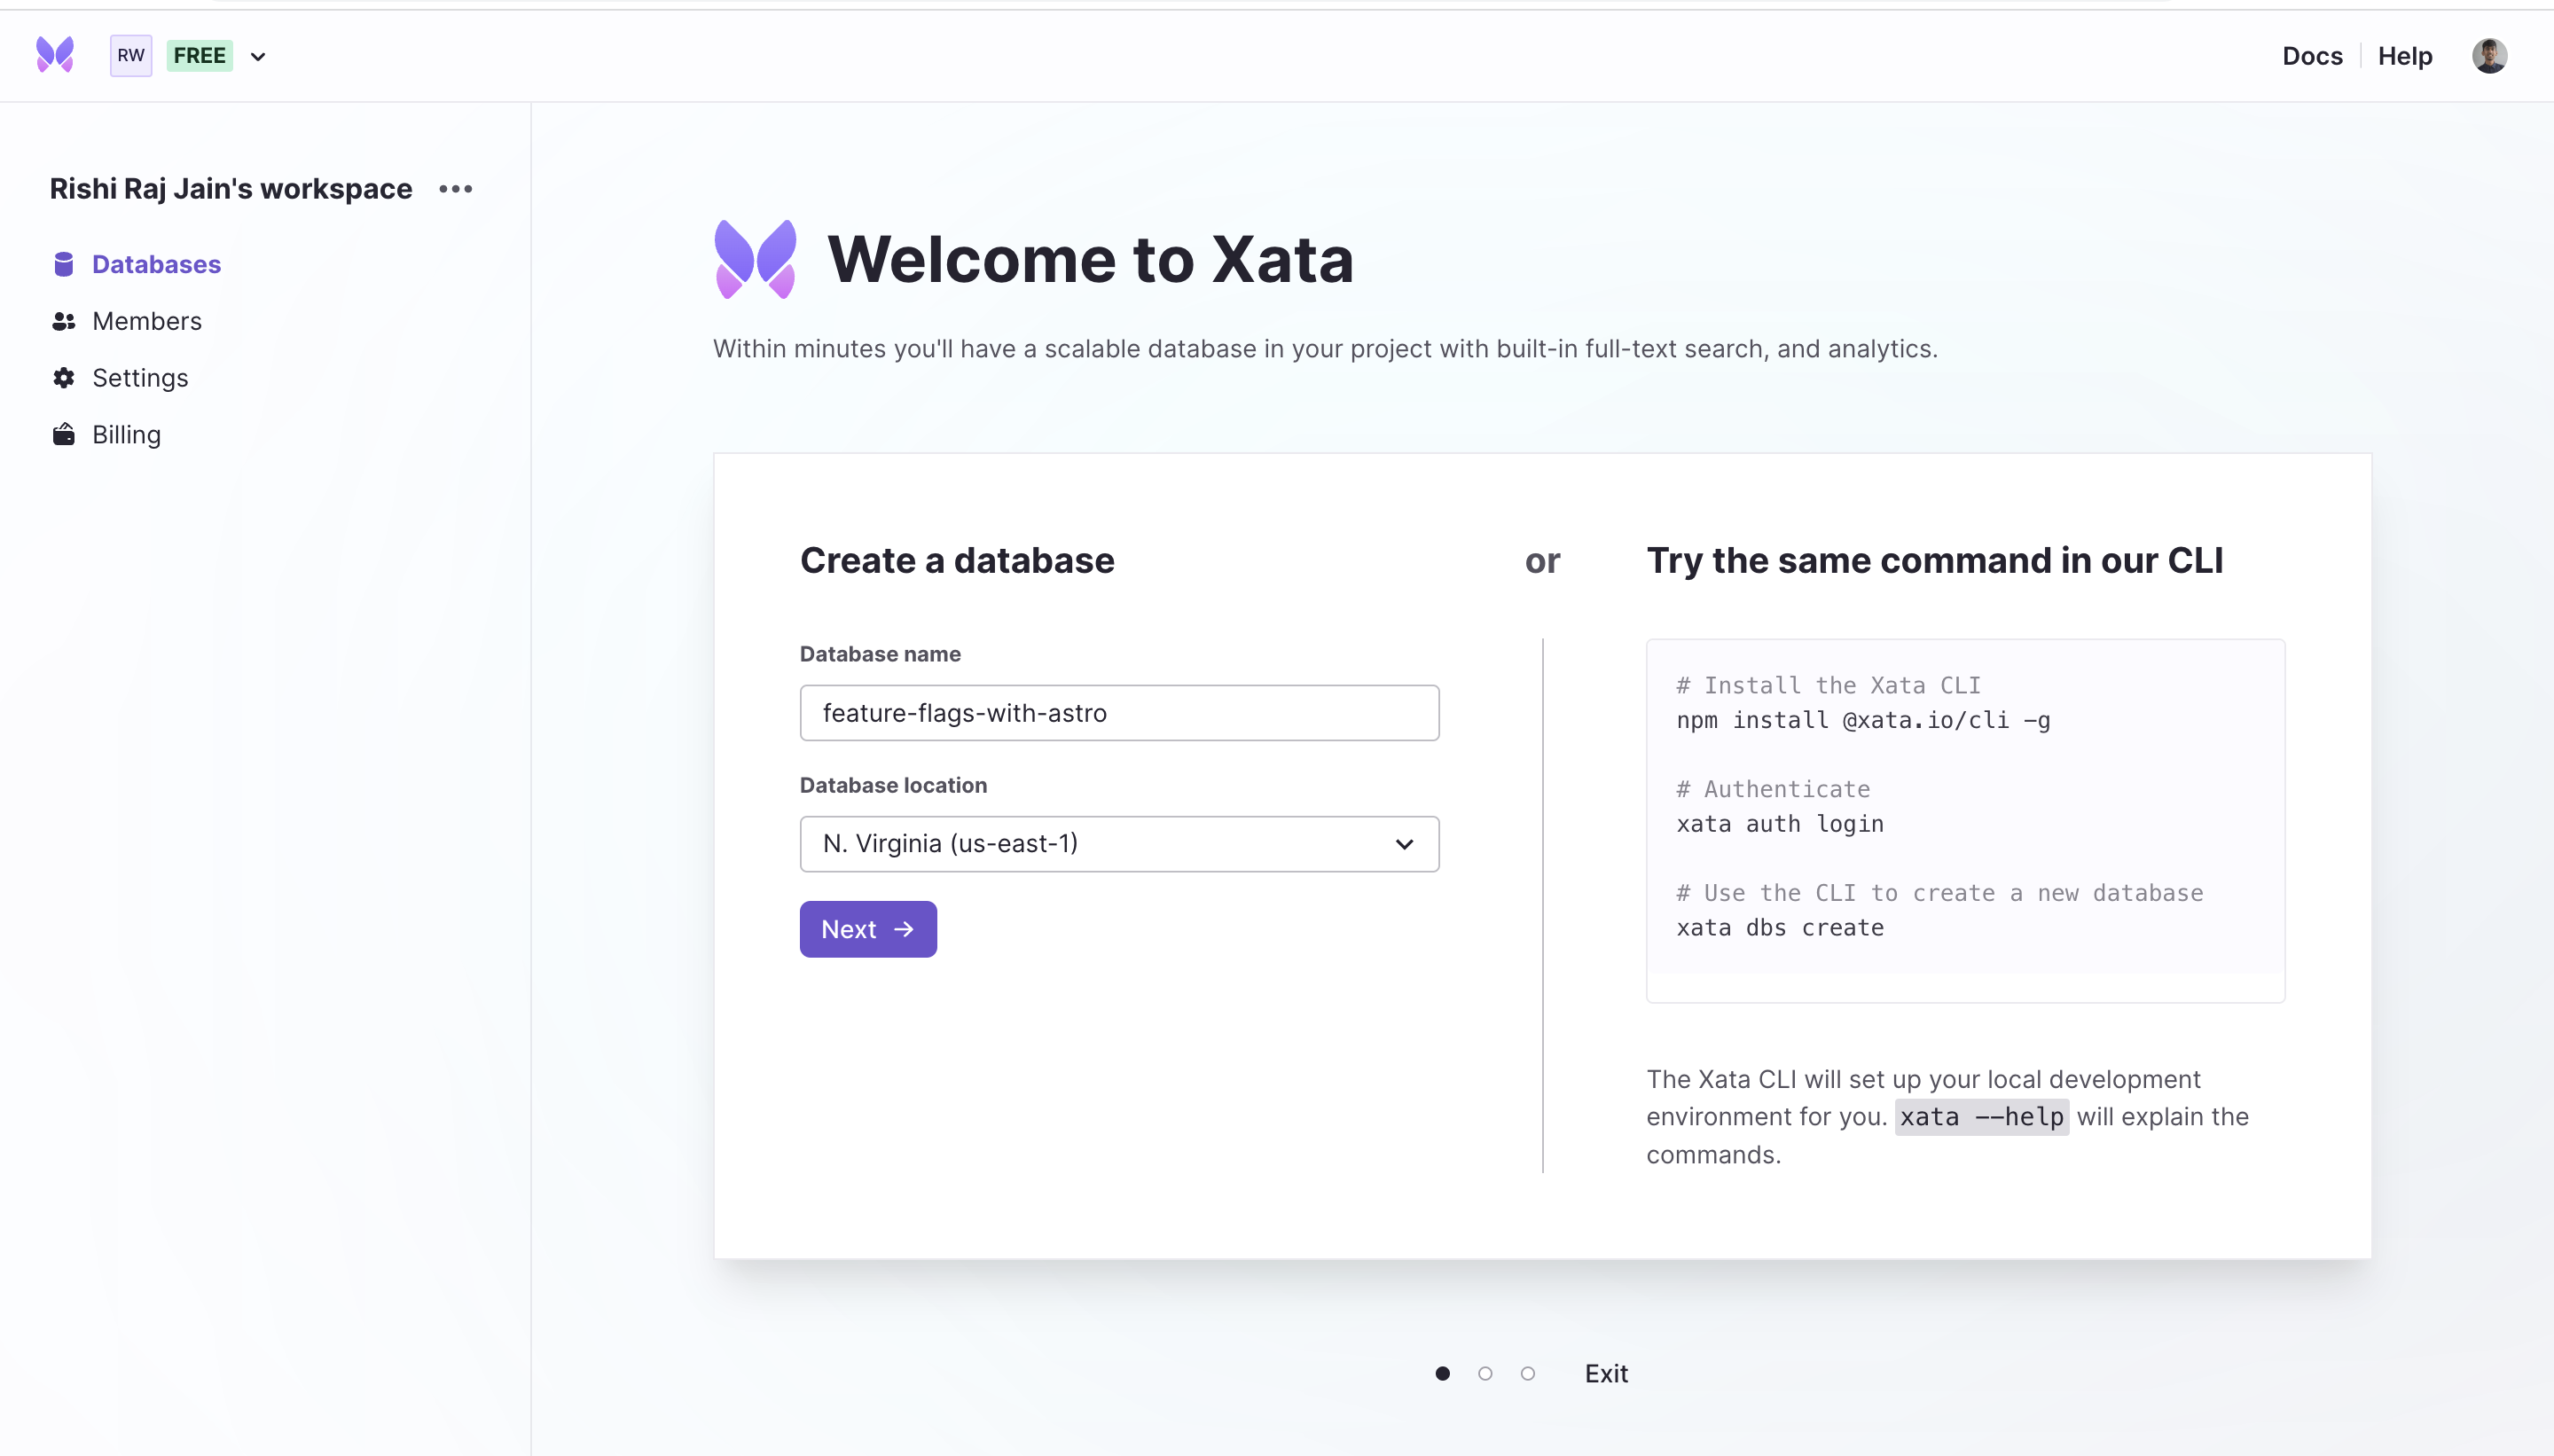
Start by creating a Xata account, then log in to create a database.
After creating your database, you'll need to make a table for your feature flag attributes.

Great! Now that you've completed that step, you should see the table in its default state, as shown below 👇🏻
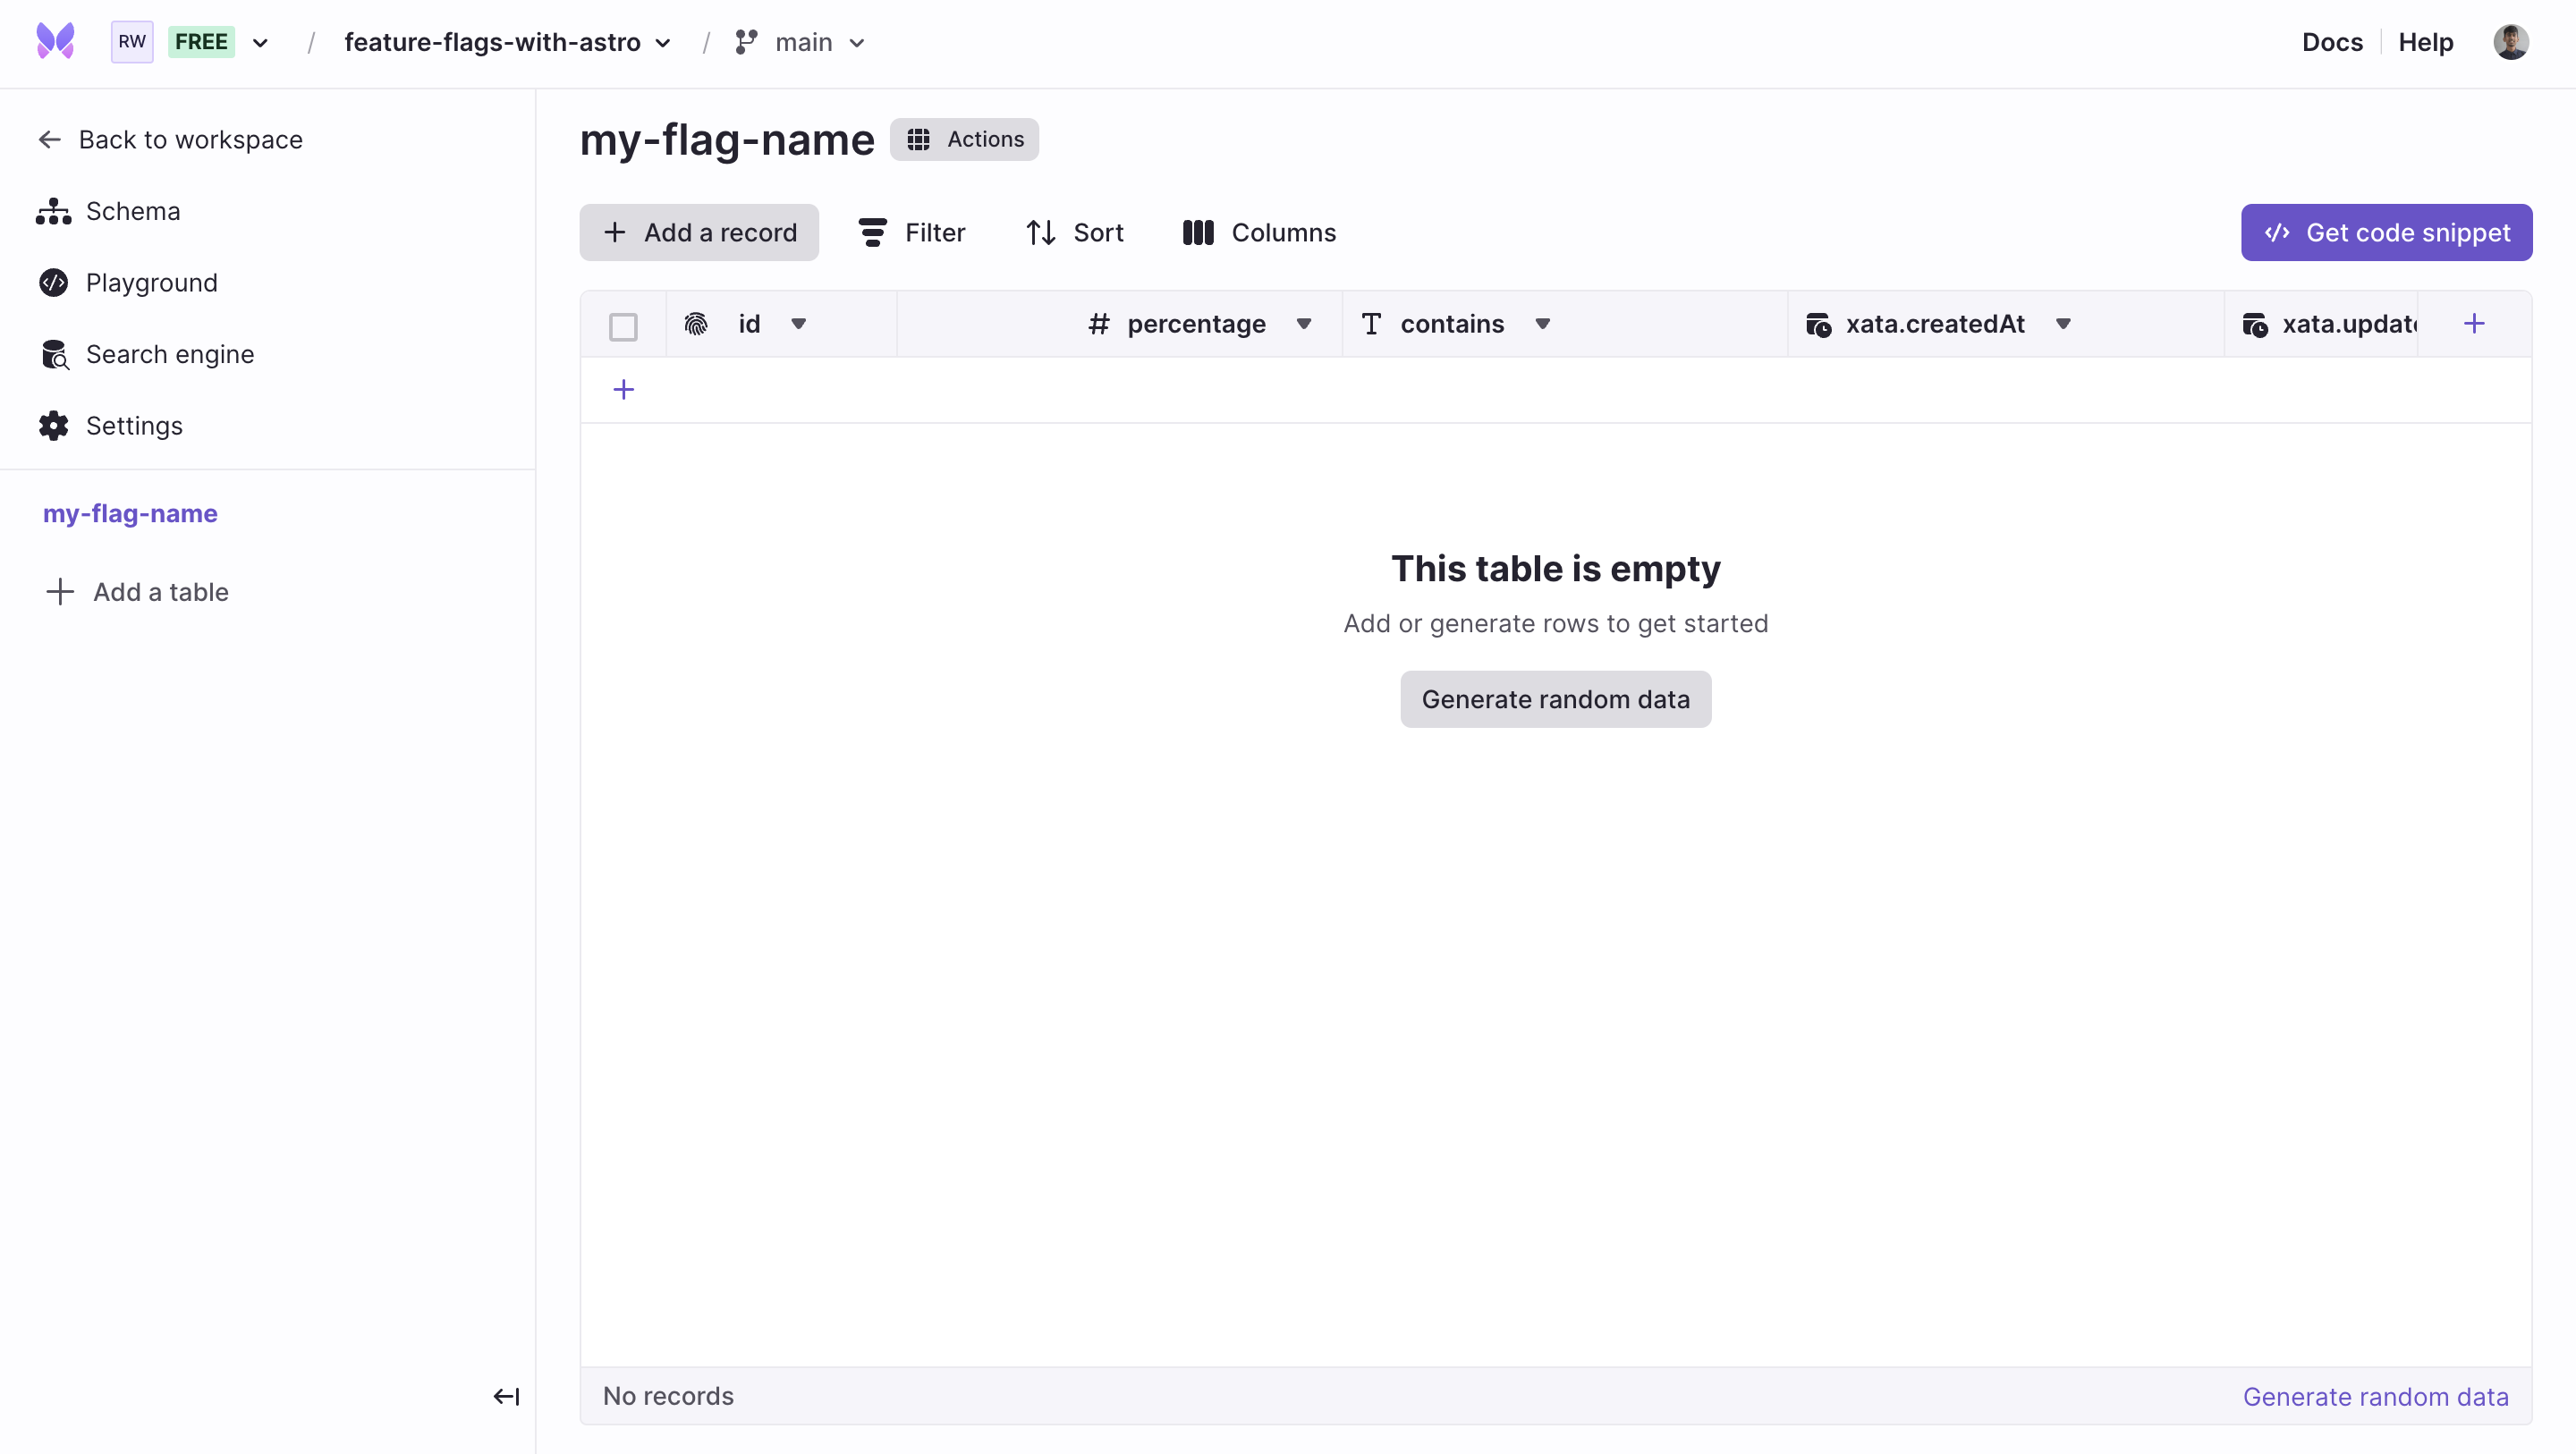
Let's move on to adding the feature flag with it’s relevant properties in the table you’ve created.
In this particular example, you’ll create a feature flag that allows us to process email domains, such as @someone.com, @gmail.com, etc. and define a percentage number so that the feature flag can be rolled back whenever required.
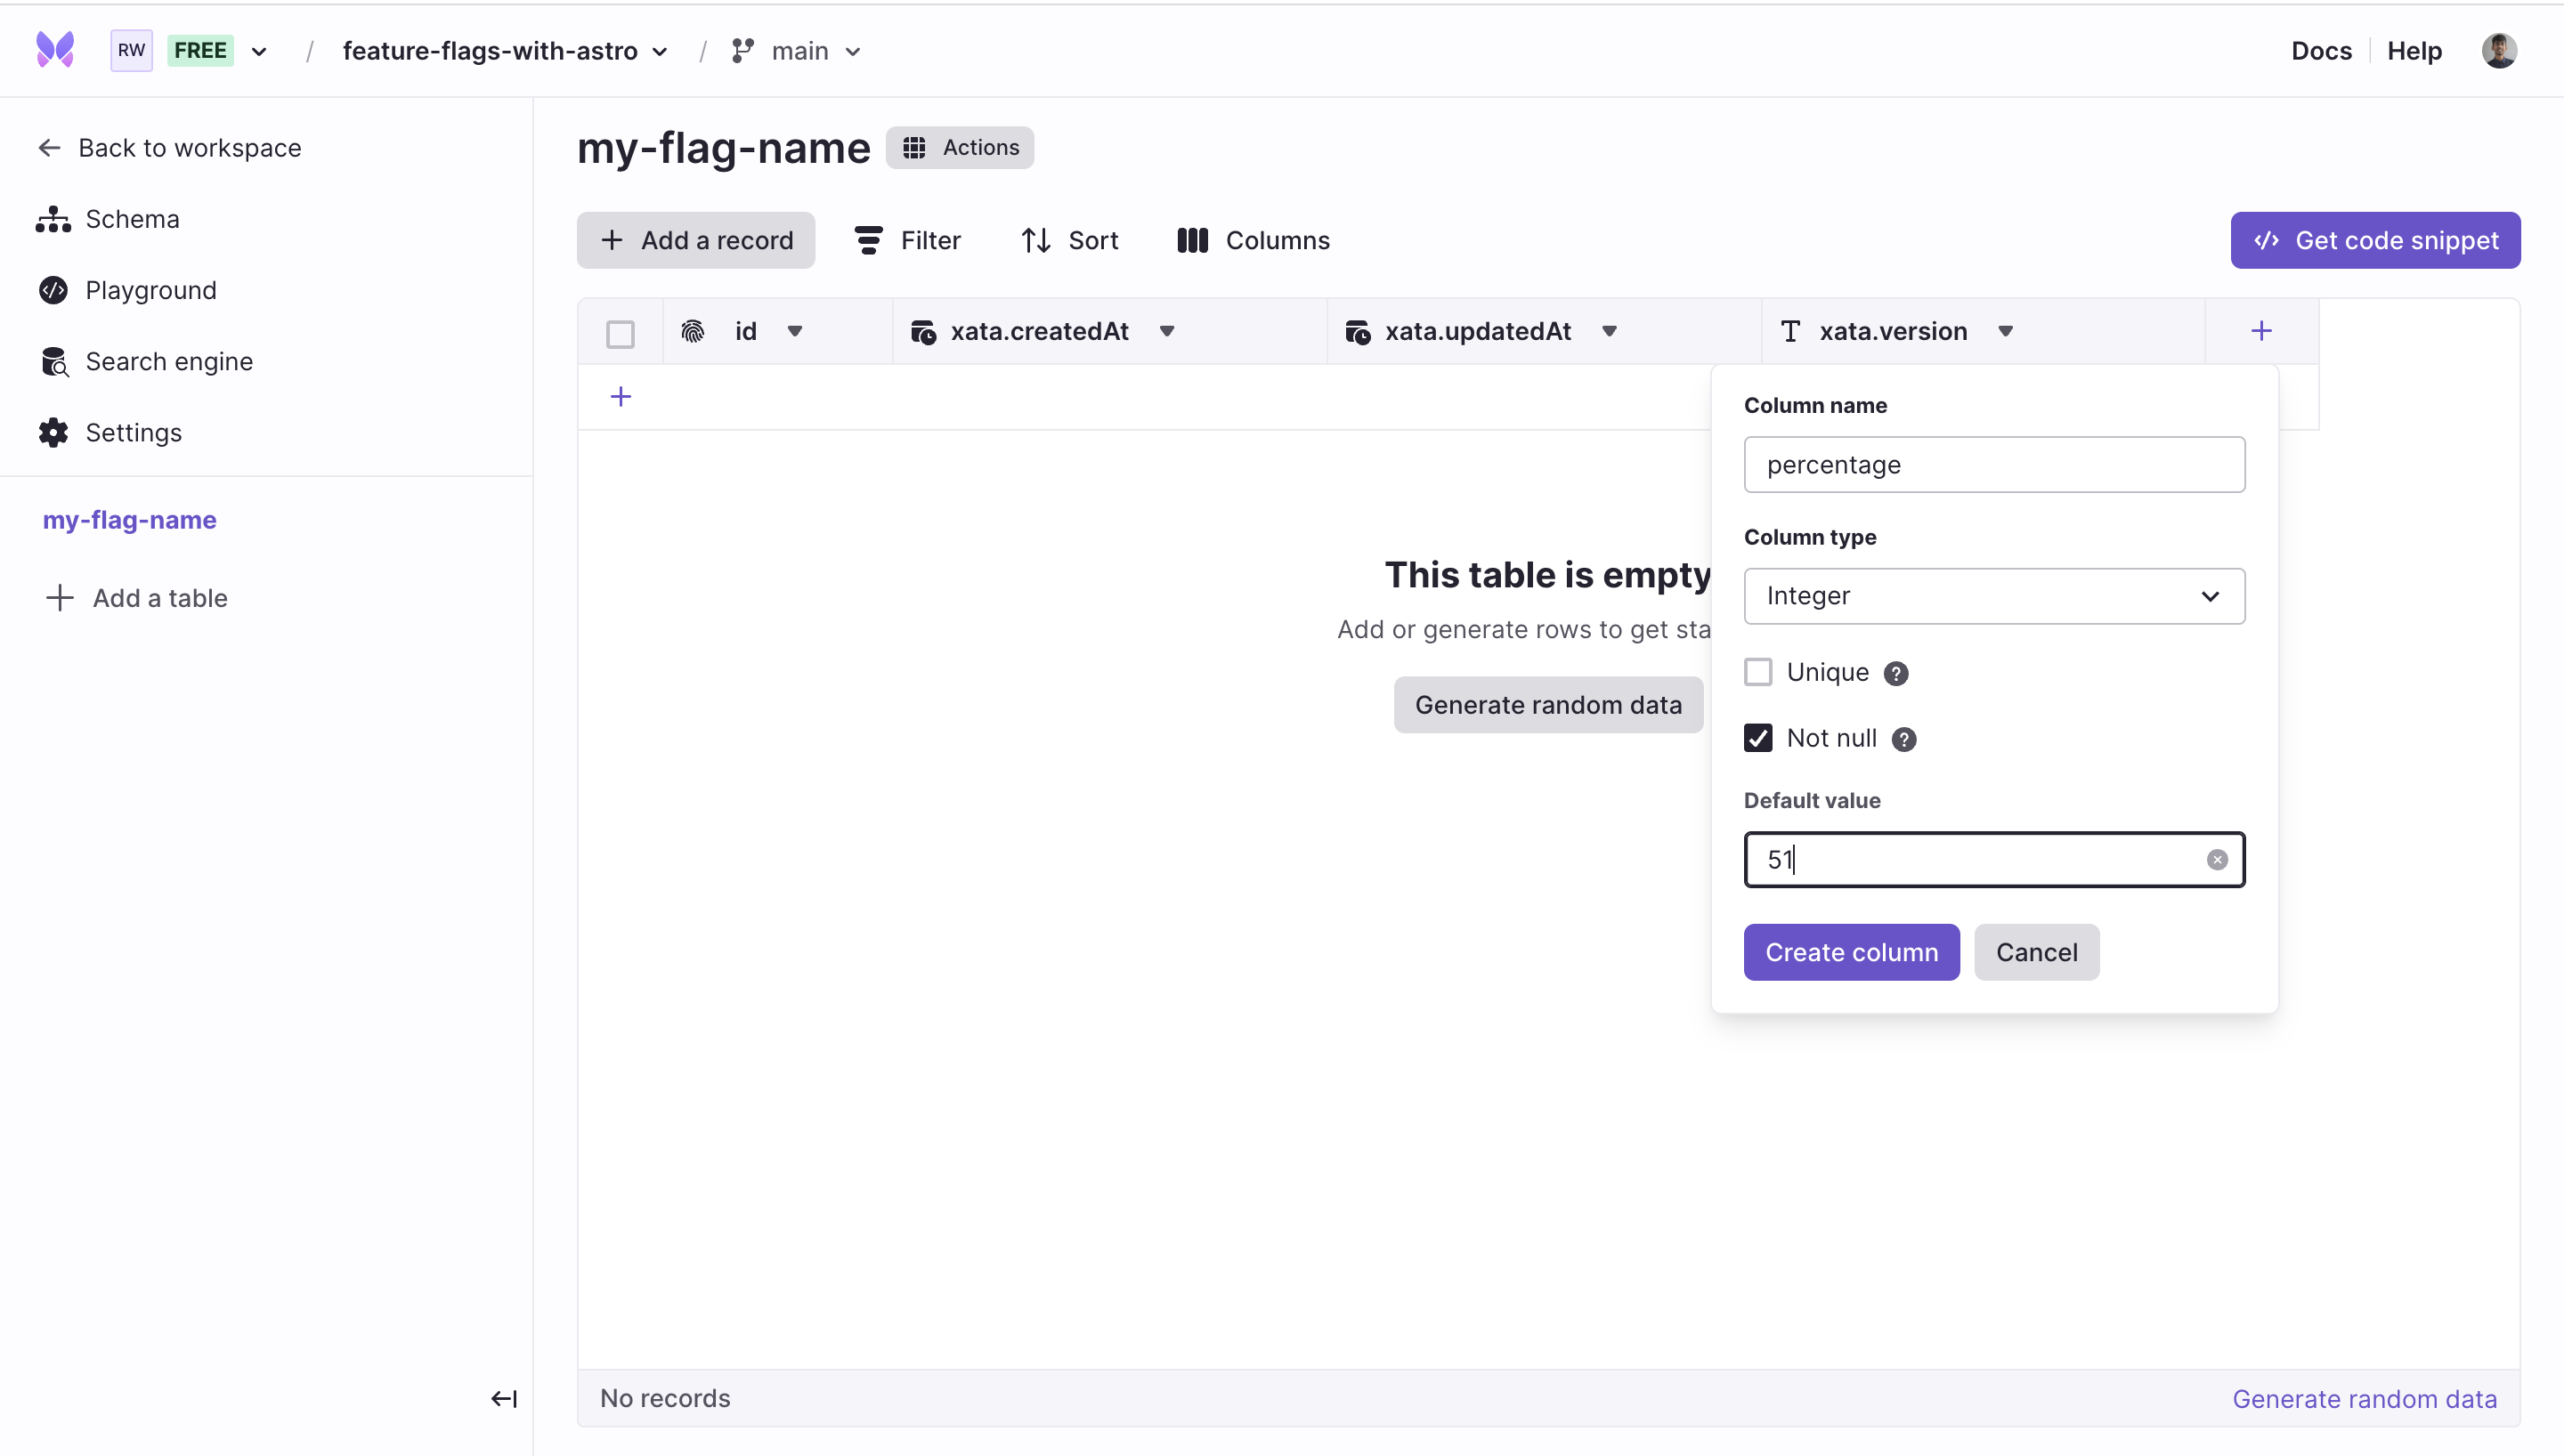
First, add the percentage attribute. Click + and select Integer.
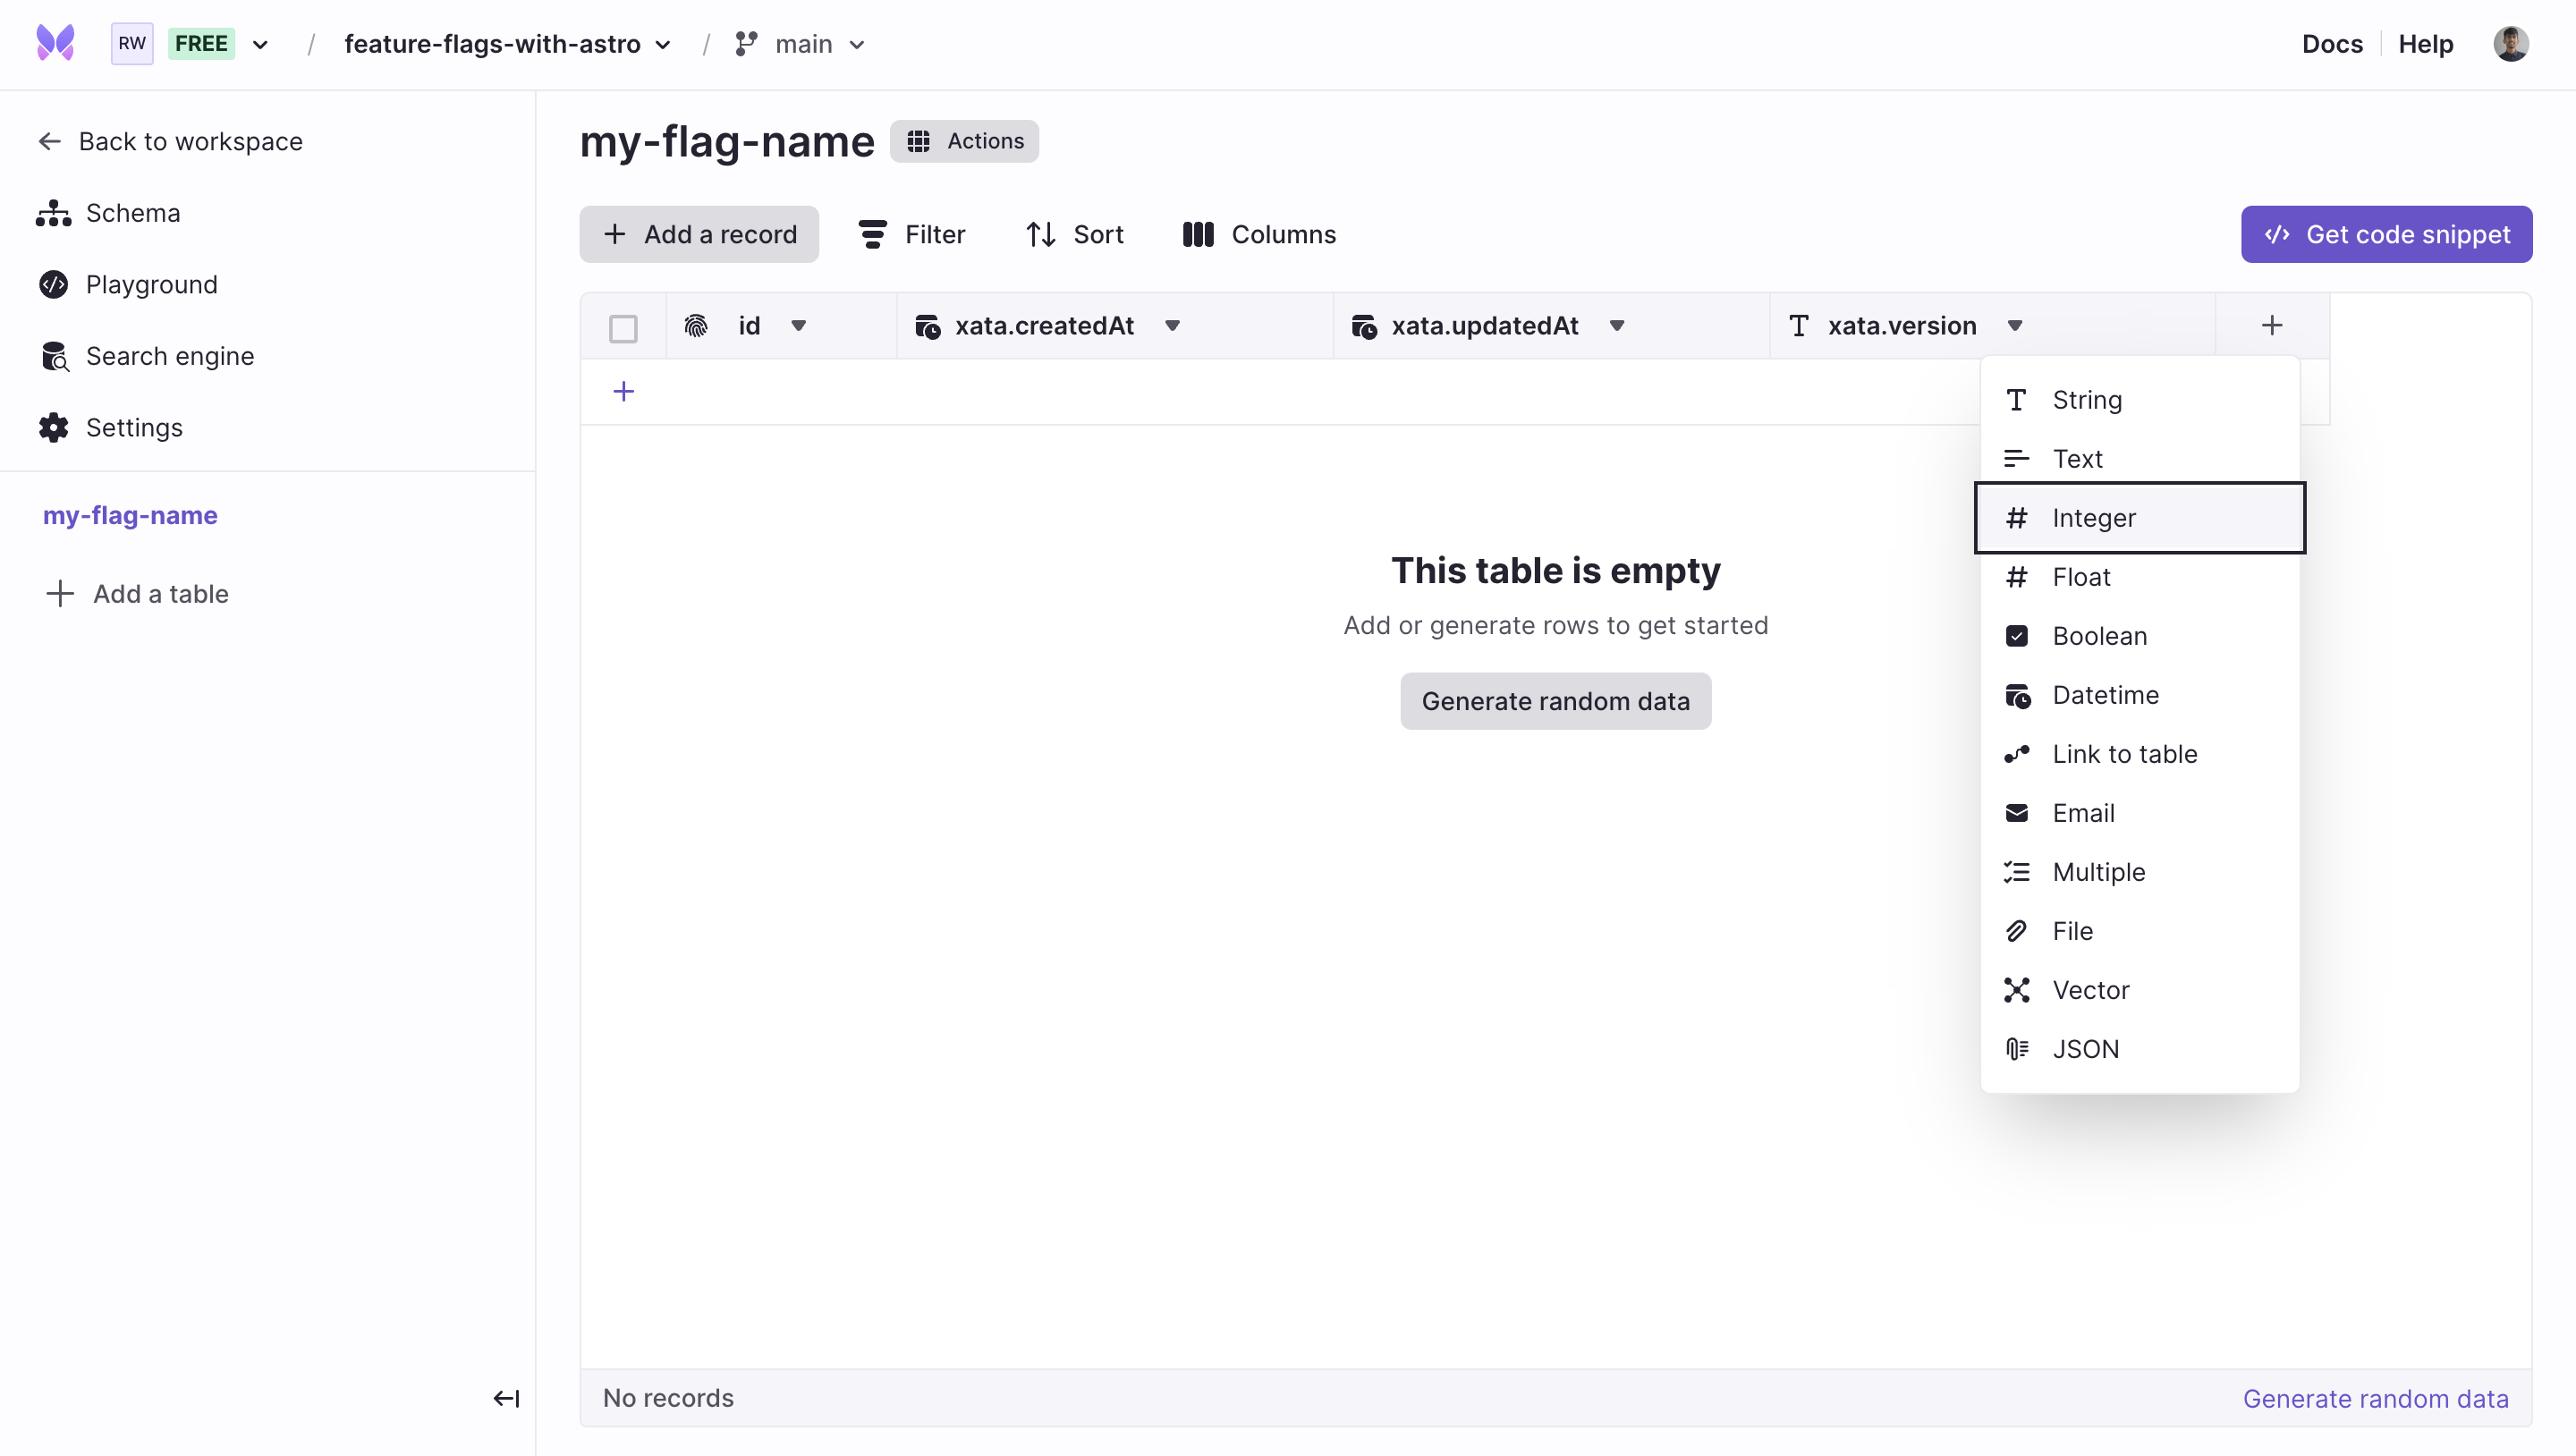
Set the column name to percentage and avoid any null values. Select the Not null option and set the default value to 51.
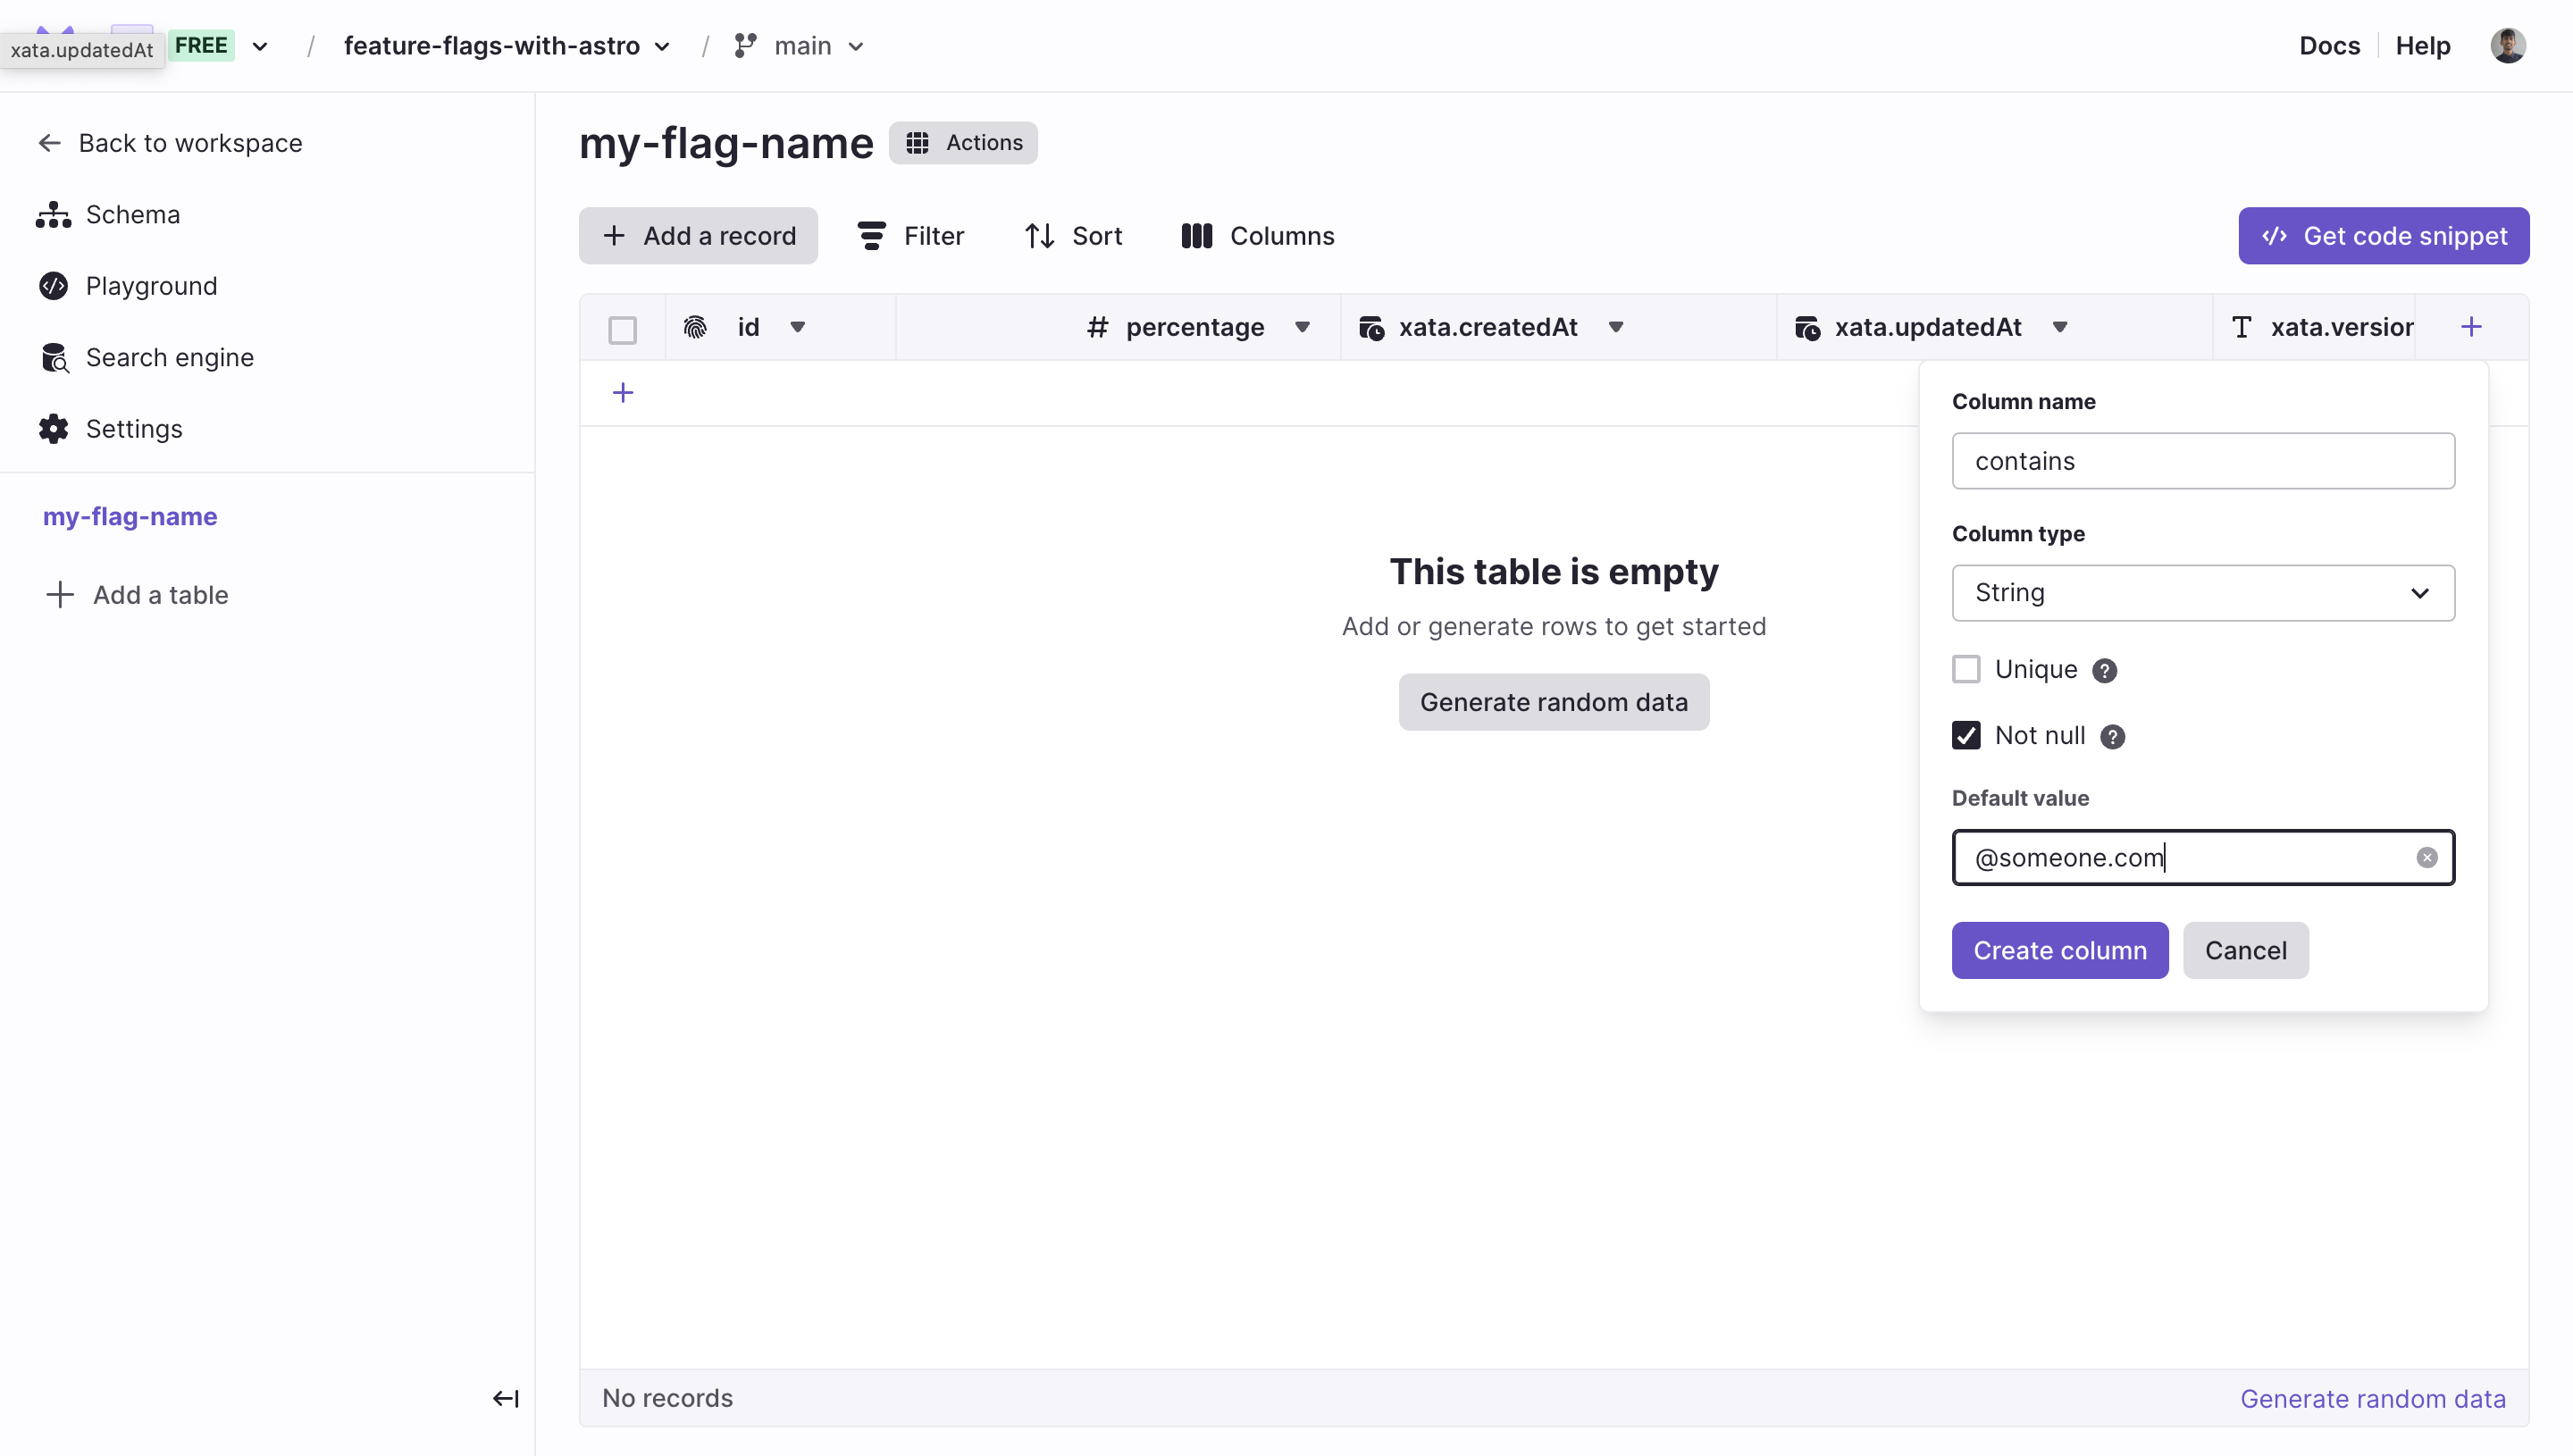
Great! Now, let’s add the contains attribute. By setting up a contains attribute, you can target specific conditions or criteria within your app. For instance, if the attribute is set to @someone.com, you can tailor the app's behavior for users with email addresses containing this domain. To add the attribute, click + and select String from the dropdown.
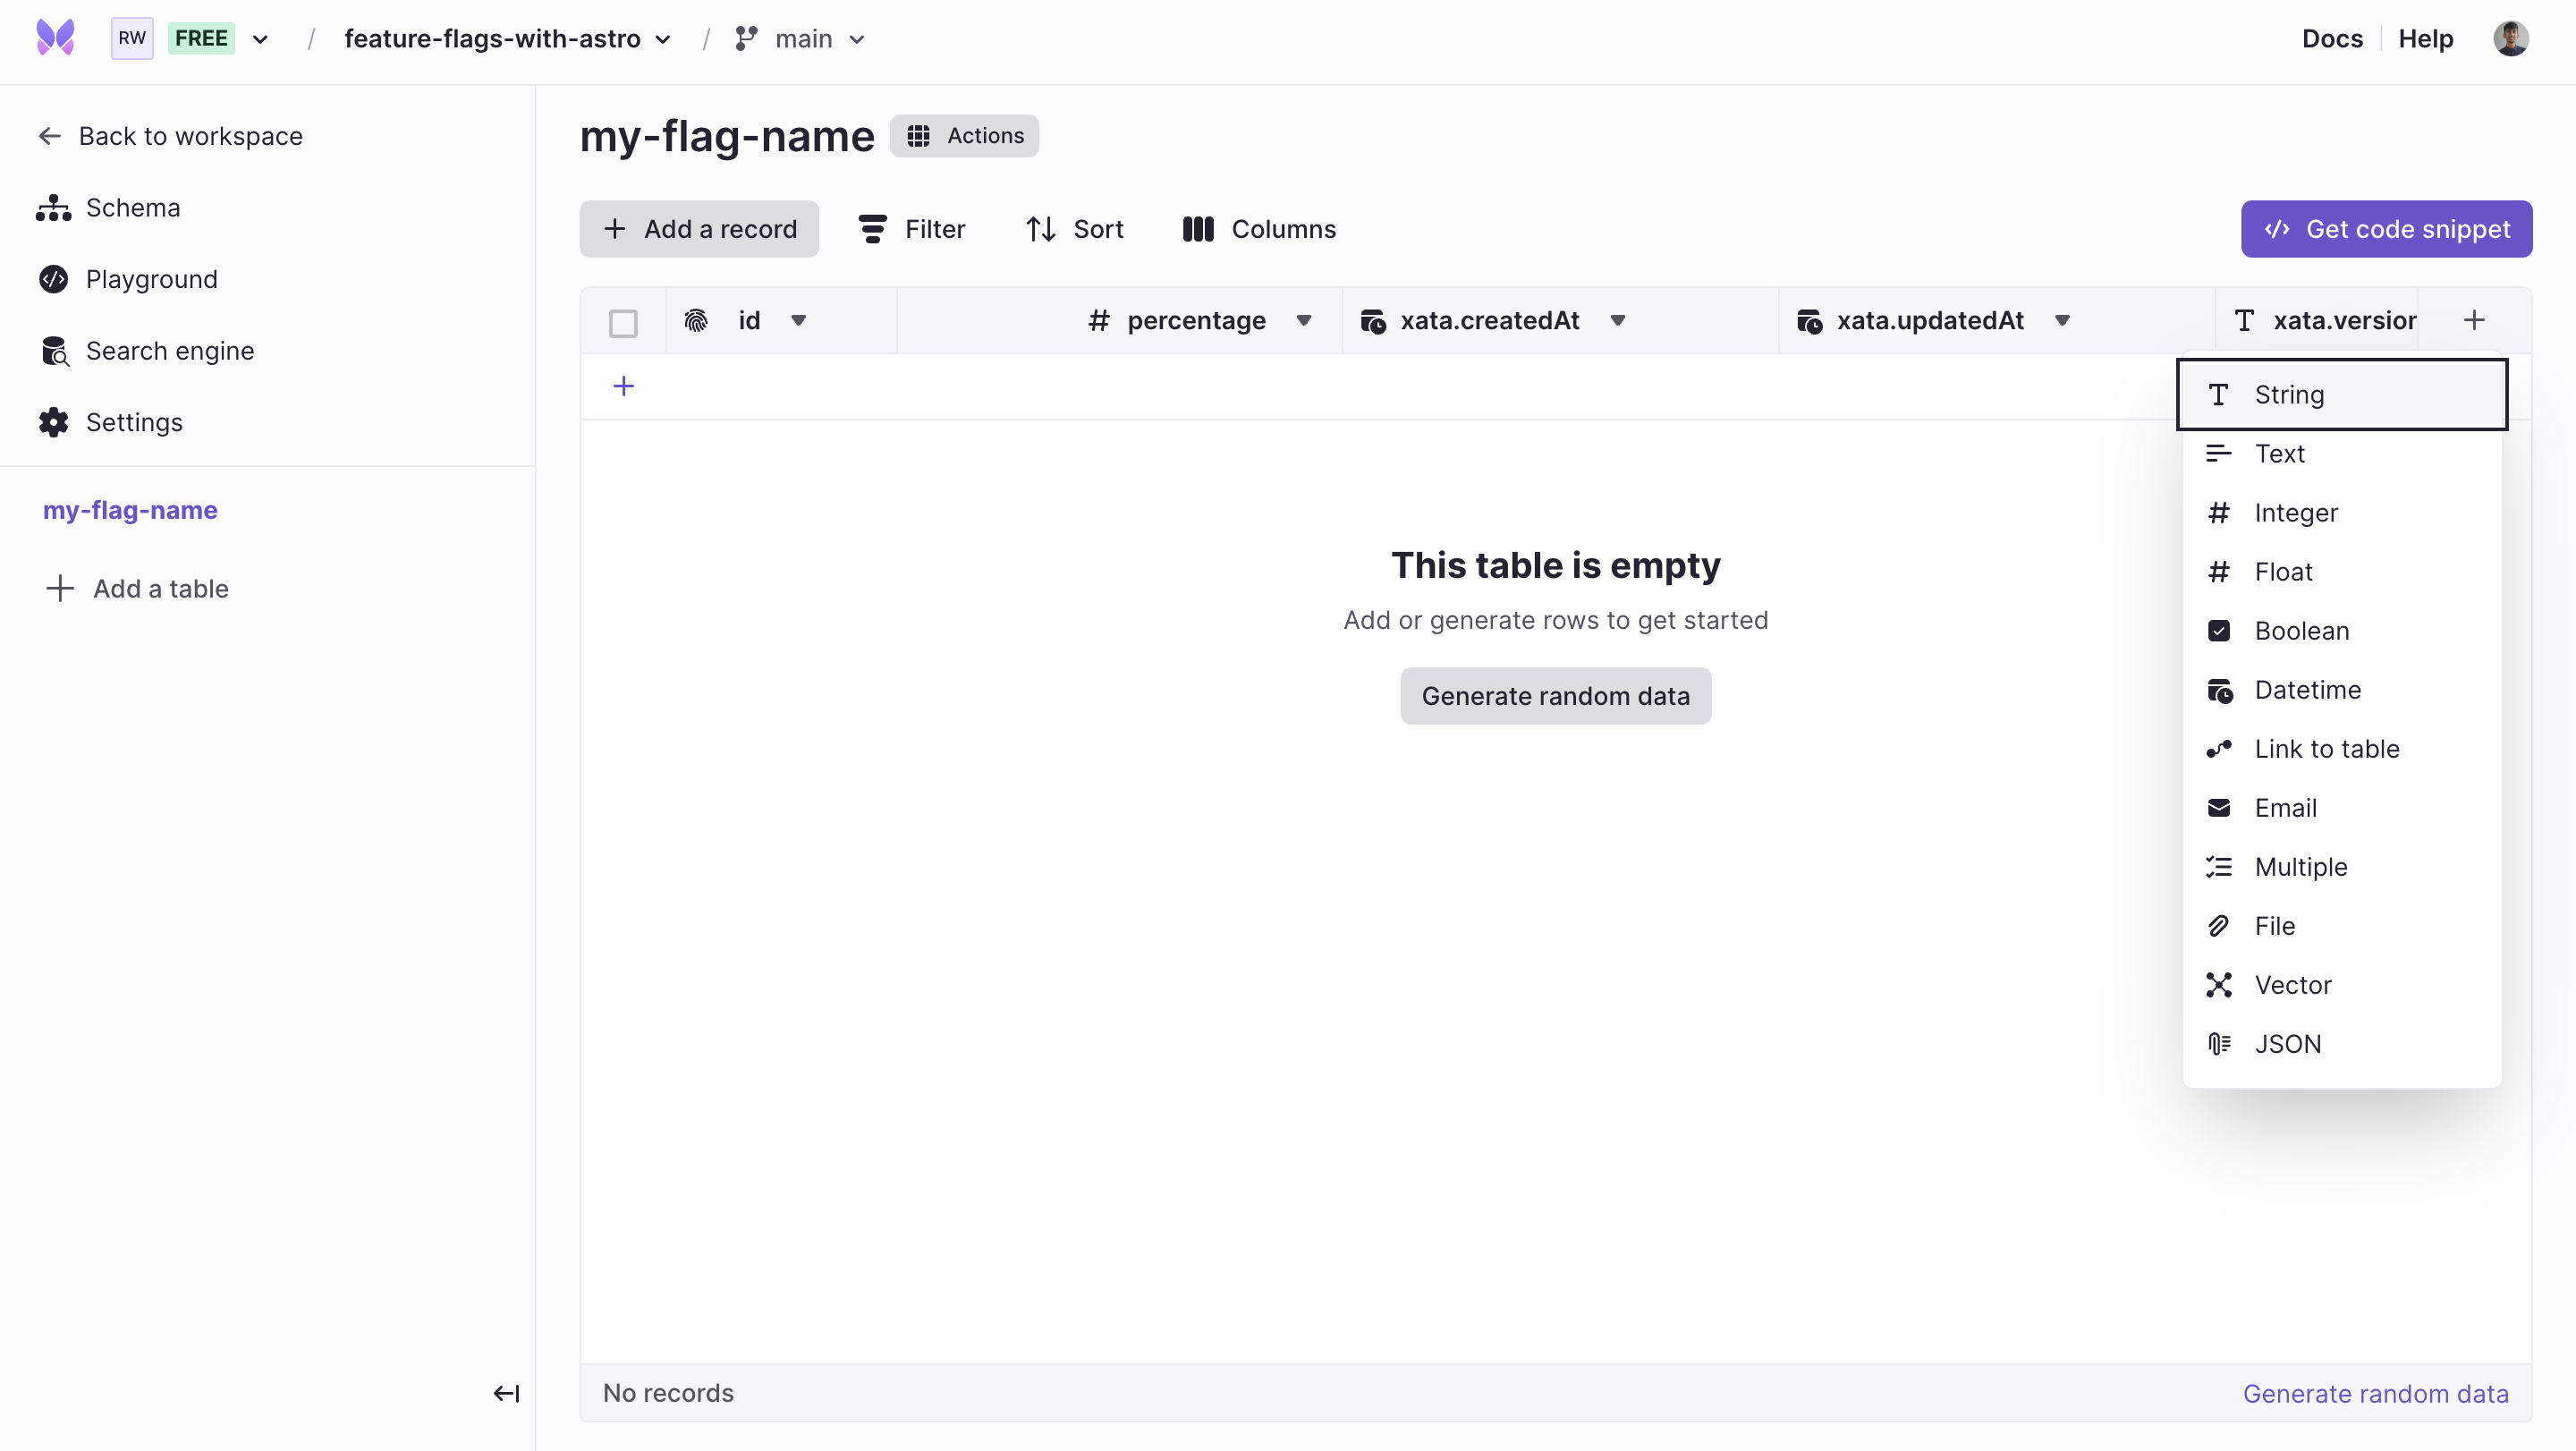
Set the column name to contains and again avoid any null values. Select the Not null option. Choosing the string data type allows you to specify text-based conditions. Marking the field as Not null ensures that every record in the database has a value for this attribute, maintaining the consistency and reliability of your data. Set a default value of, for example, @someone.com.
Awesome! We’re now done with configuring the feature flag table and now can use it in your frontend to customize the onboarding flow.
Fork the repository by navigating to the original GitHub repository at https://github.com/rishi-raj-jain/adding-feature-flags-to-your-astro-app-with-xata-and-vercel. Click Fork at the top right corner of the page. This creates a copy of the repository in your GitHub account.
Once the repository is forked, clone it to your local machine. Replace your-username with your GitHub username in the following command:
git clone https://github.com/rishi-raj-jain/adding-feature-flags-to-your-astro-app-with-xata-and-vercel
cd adding-feature-flags-to-your-astro-app-with-xata-and-vercel
npm installTo use Xata with Astro, install the Xata CLI globally:
npm install @xata.io/cli -gAuthorize the Xata CLI to associate with the logged in account:
xata auth login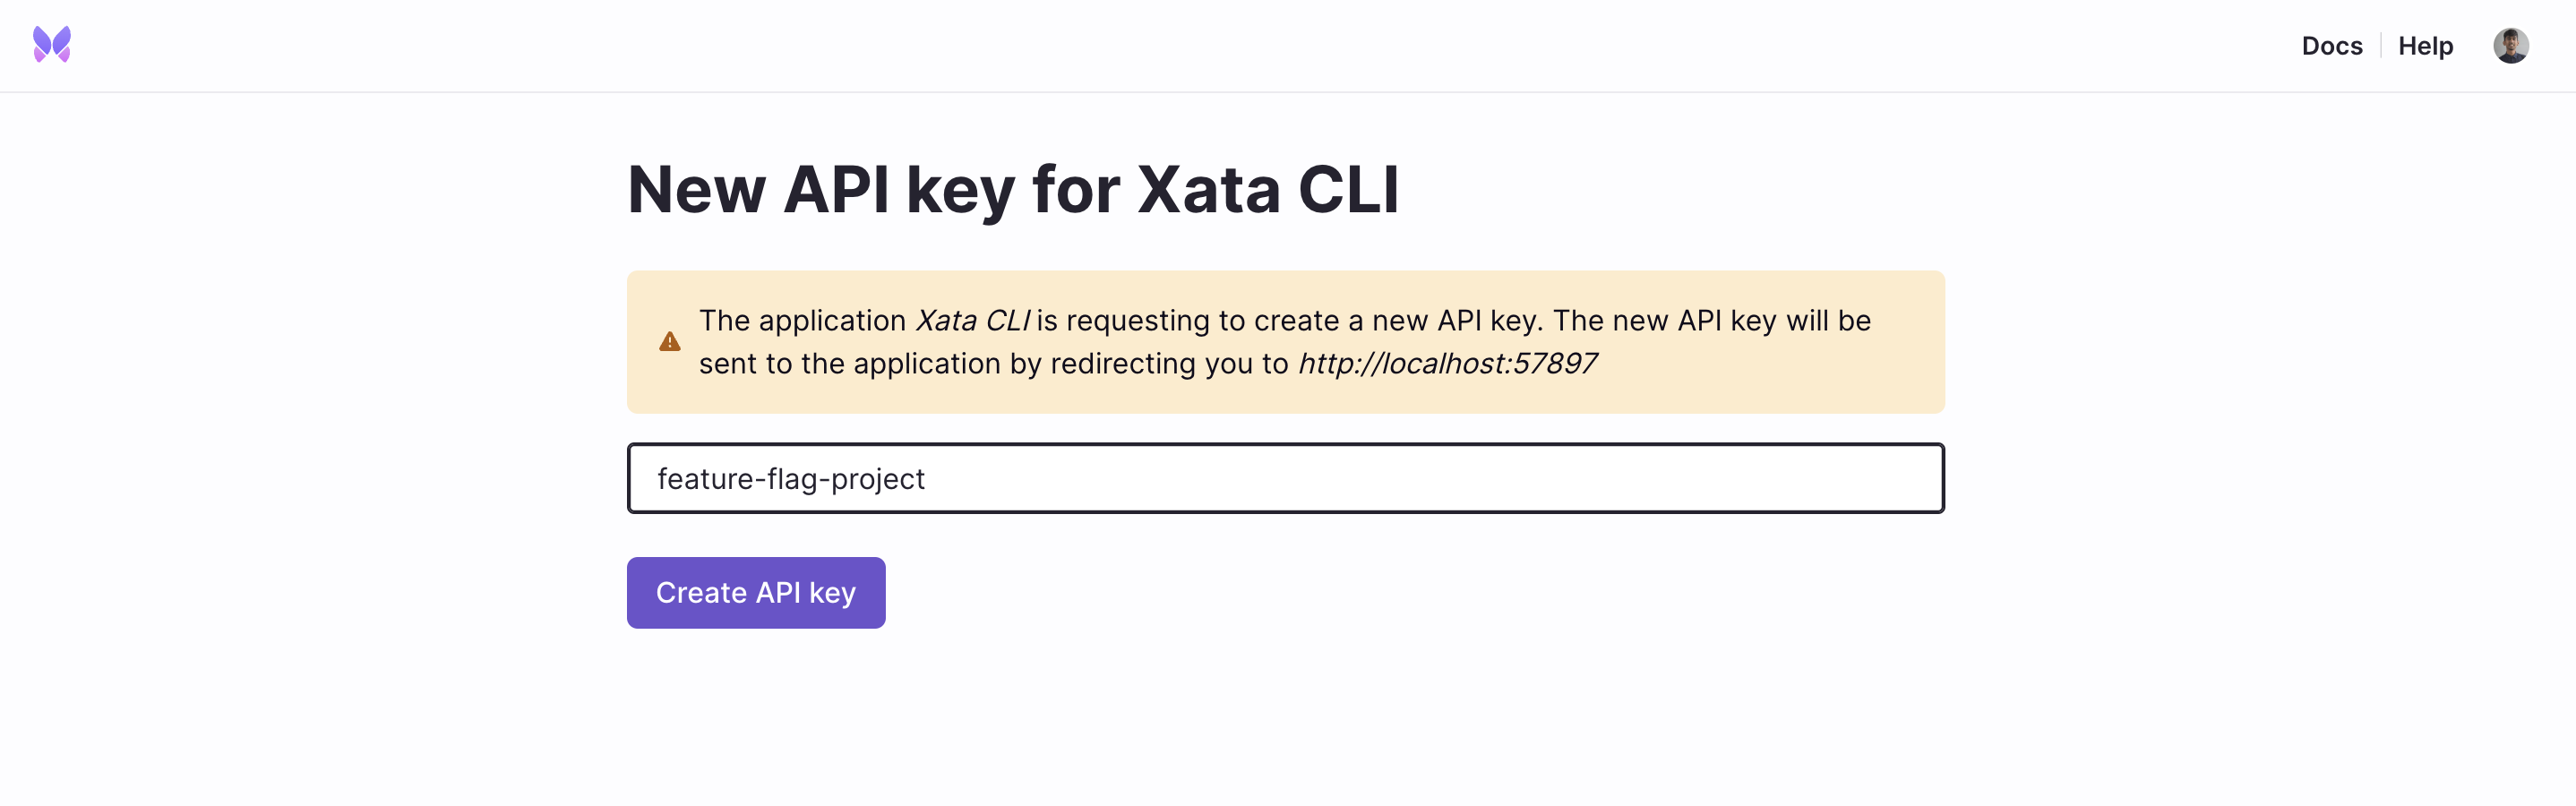
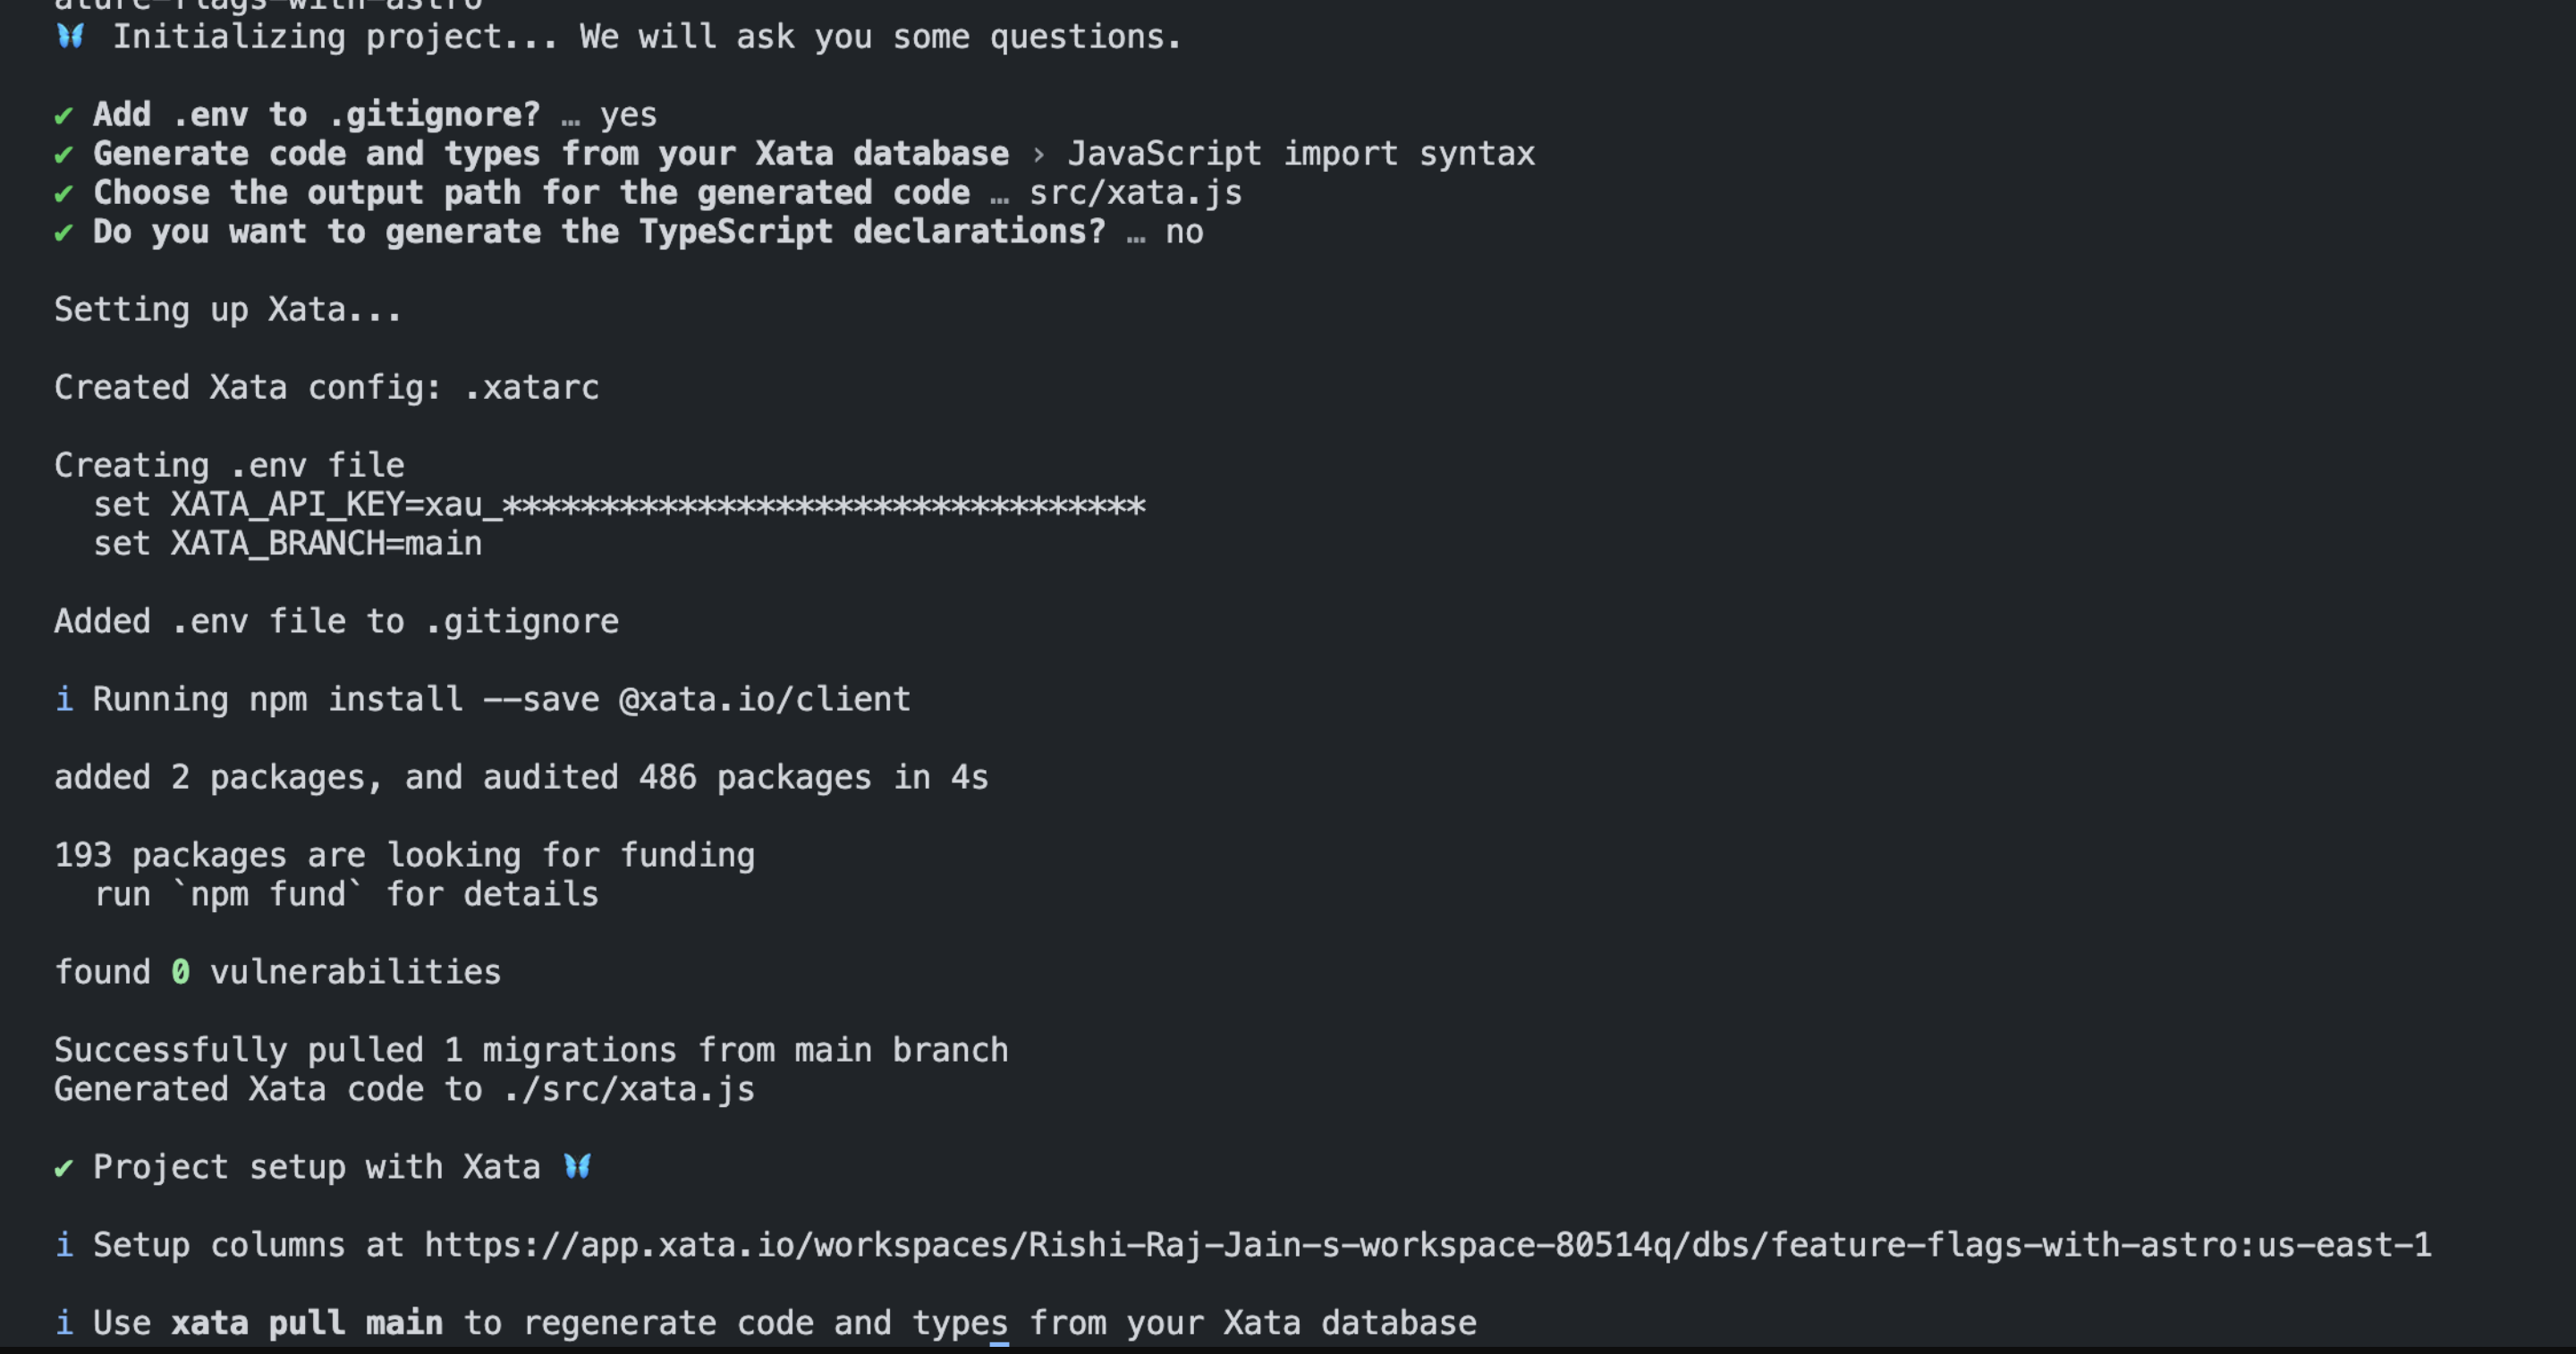
Great! Initialize the project locally with the Xata CLI command with something like what is presented below:
xata init --db https://Rishi-Raj-Jain-s-workspace-80514q.us-east-1.xata.sh/db/feature-flags-with-astroLastly, answer some quick prompts to make the integration with Astro seamless for you.
In this section, you'll learn how to customize an onboarding flow using feature flags set in Xata. You'll implement form actions in Astro routes, fetch feature flag from Xata, and define your own onboarding logic.
With Astro, you can also allow transitions on form submissions.
Enable form actions with view transitions in src/layouts/Layout.astro:
---
import { ViewTransitions } from "astro:transitions";
---

<html>
  <head>
    <ViewTransitions handleForms />
  </head>
  <body>
    <!-- Added info here -->
  </body>
</html>
This setup allows you to combine both backend and frontend flows for a page in Astro. Suppose you want to handle a form submission that includes the user's email, process it server-side, and display various outcomes based on your logic, all on the homepage. You can achieve this seamlessly within a single Astro route, like src/pages/index.astro:
---
const response = { form: false }
if (Astro.request.method === 'POST') {
try {
// Indicate that the request is being processed
response.form = true
// Get the user email from the form submissions
const data = await Astro.request.formData()
const userEmail = data.get('email') as string
// Fetch feature flag from Xata
// Define our own processing logic
} catch (e) {
// pass
}
}
---
{response.form && <DisplayLogicComponent />}
<form method="post" autocomplete="off">
<input
required
name="email"
type="email"
placeholder="Email Address (a demo)"
/>
<button type="submit">
Proceed →
</button>
</form>To customize the onboarding flow, the first step is to fetch the feature flag object from Xata. In this example, we’re gonna be using the percentage and contains properties of the feature flag to define our processing logic further. Using Xata Read, you can retrieve a record with a given ID, the-flag and destructure the relevant properties.
---
// Import the Xata Client created by Xata CLI in src/xata.js
import { XataClient } from '@/xata';

if (Astro.request.method === 'POST') {
  // ...
  // Fetch Feature from Xata

  // Create a Xata Client to fetch the flag from
  const xata = new XataClient({
    apiKey: import.meta.env.XATA_API_KEY,
    branch: import.meta.env.XATA_BRANCH
  });

  // Get the percentage property set in the flag
  // Get the contains property set in the flag
  const { percentage, contains } = await xata.db['my-flag-name'].read('the-flag');

  // Define your processing logic
  // ...
}
---Based on the extracted values from the feature flag object, we'll onboard users whose emails end with @someone.com, as specified in the contains variable, only if the percentage value for this feature flag in Xata is over 30. By adjusting the percentage value in the [Xata dashboard] to be above or below 30, you can effectively switch this feature flag on or off.
---
const response = { form: false, onboarded: false, userEmail: '' }

if (Astro.request.method === 'POST') {

	// ...
	// Define our processing logic

  if (userEmail) {
    response.userEmail = userEmail

    // Check if email contains the expected,
    // if yes onboard the user to a new flow
    if (percentage > 30 && userEmail.endsWith(contains)) {
      response.onboarded = true
    }

    // If not, let's not onboard the user to the new flow
    else {
      response.onboarded = false
    }
  }

}
---
<!-- Render conditional states using the onboarded flag -->
{response.form && <>{response.onboarded ? <Success /> : <Failure />}</>}The repository, is now ready to deploy to Vercel. Use the following steps to deploy: 👇🏻
- Start by creating a GitHub repository containing your app's code.
- Then, navigate to the Vercel Dashboard and create a New Project.
- Link the new project to the GitHub repository you just created.
- In Settings, update the Environment Variables to match those in your local
.envfile. - Deploy! 🚀
Way to go! You've now successfully added feature flags to you Astro app with Xata and Vercel, equipping your app for further development and success!
We'd love to hear from you if you have any feedback on this tutorial, if you'd like to know more about Xata, or if you would like to contribute a community blog or tutorial. Reach out to us on Discord or join us on X | Twitter. Happy building 🦋
Start free,
pay as you grow
Xata provides the best free plan in the industry. It is production ready by default and doesn't pause or cool-down. Take your time to build your business and upgrade when you're ready to scale.
- Single team member
- 10 database branches
- High availability
- 15 GB data storage
- Single team member
- 10 database branches
- High availability
- 15 GB data storage
Copyright © 2025 Xatabase Inc.
All rights reserved.