Caching OpenAI Chat API Responses with LangChain and Xata
Learn how to cache OpenAI Chat API responses in LangChain with Xata.
Written by
Rishi Raj Jain
Published on
March 27, 2024
In this guide, you'll learn how to cache OpenAI Chat API responses in different ways using LangChain and Xata. You’ll learn how to:
- Set up a Xata Database
- Cache LangChain ChatOpenAI Responses using Callbacks
- Cache LangChain ChatOpenAI Responses using Cache Layer
You'll need the following:
- Node.js 18 or later
- pnpm package manager
- A Xata account
- An OpenAI account
The following technologies are used in this guide:
| Technology | Description |
|---|---|
| Express.js | Fast, unopinionated, minimalist web framework for Node.js. |
| Xata | Serverless database platform for scalable, real-time applications. |
| OpenAI | OpenAI is an artificial intelligence research lab focused on developing advanced AI technologies. |
| LangChain | Framework for developing applications powered by language models. |
Caching responses from the OpenAI API significantly speeds up your application and save costs by reducing the number of unnecessary API calls. This is particularly useful for applications that generate similar queries often, as responses can be stored and reused. By integrating LangChain and Xata, you can efficiently cache responses in a scalable and real-time manner.
To quickly create endpoints demonstrating different ways of caching OpenAI Chat API responses, you’re going to create an Express.js application. To start building the application, create a new directory for your Express.js project. Open your terminal and run the following command:
mkdir xata-cache-openai-langchain
cd xata-cache-openai-langchain
Then, create a blank npm project by executing the following command:
npm init -yNext, in your first terminal window, run the command below to install the necessary libraries and packages for building the application:
pnpm add express
pnpm add -D dotenv
The above command installs the packages passed to the install command, with the -D flag specifying the libraries intended for development purposes only.
The libraries installed include:
express: A minimalist web framework for Node.js.
The development-specific libraries include:
dotenv: A library for handling environment variables.
Finally, create an index.js file with the following code:
// File: index.js

require('dotenv/config');

const PORT = 3005;

const express = require('express');
const app = express();

app.use(express.json());

app.get('/', (req, res) => {
  res.send('Home');
});

app.listen(PORT, () => {
  console.log(`Listening on http://localhost:${PORT}`);
});
The above code loads all the environments variables into the scope using dotenv’s config method, making them accessible via the process.env object. Further, it uses Express’s json middleware to serialize incoming JSON POST request bodies. Finally, it sets up the Express’s server to listen to incoming requests at port 3005.
To start running the application, execute the following command in your terminal:
node index.jsThe app should be running on localhost:3005. Currently, it just displays Home on the / page.
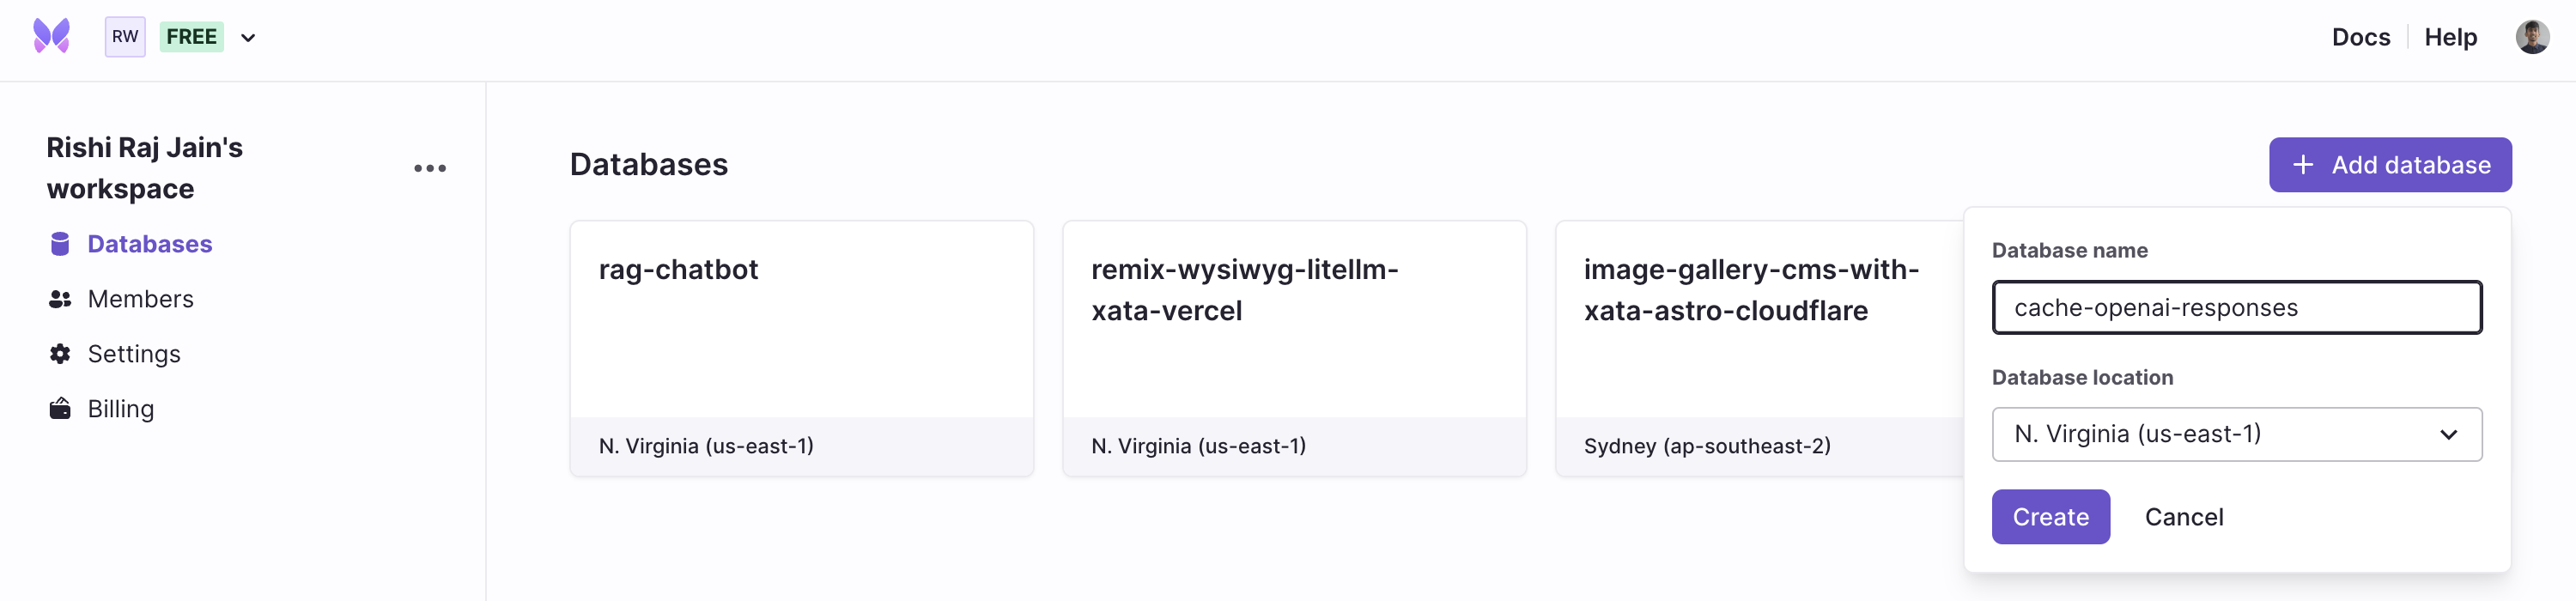
After you've created a Xata account and are logged in, create a database by clicking on + Add database.
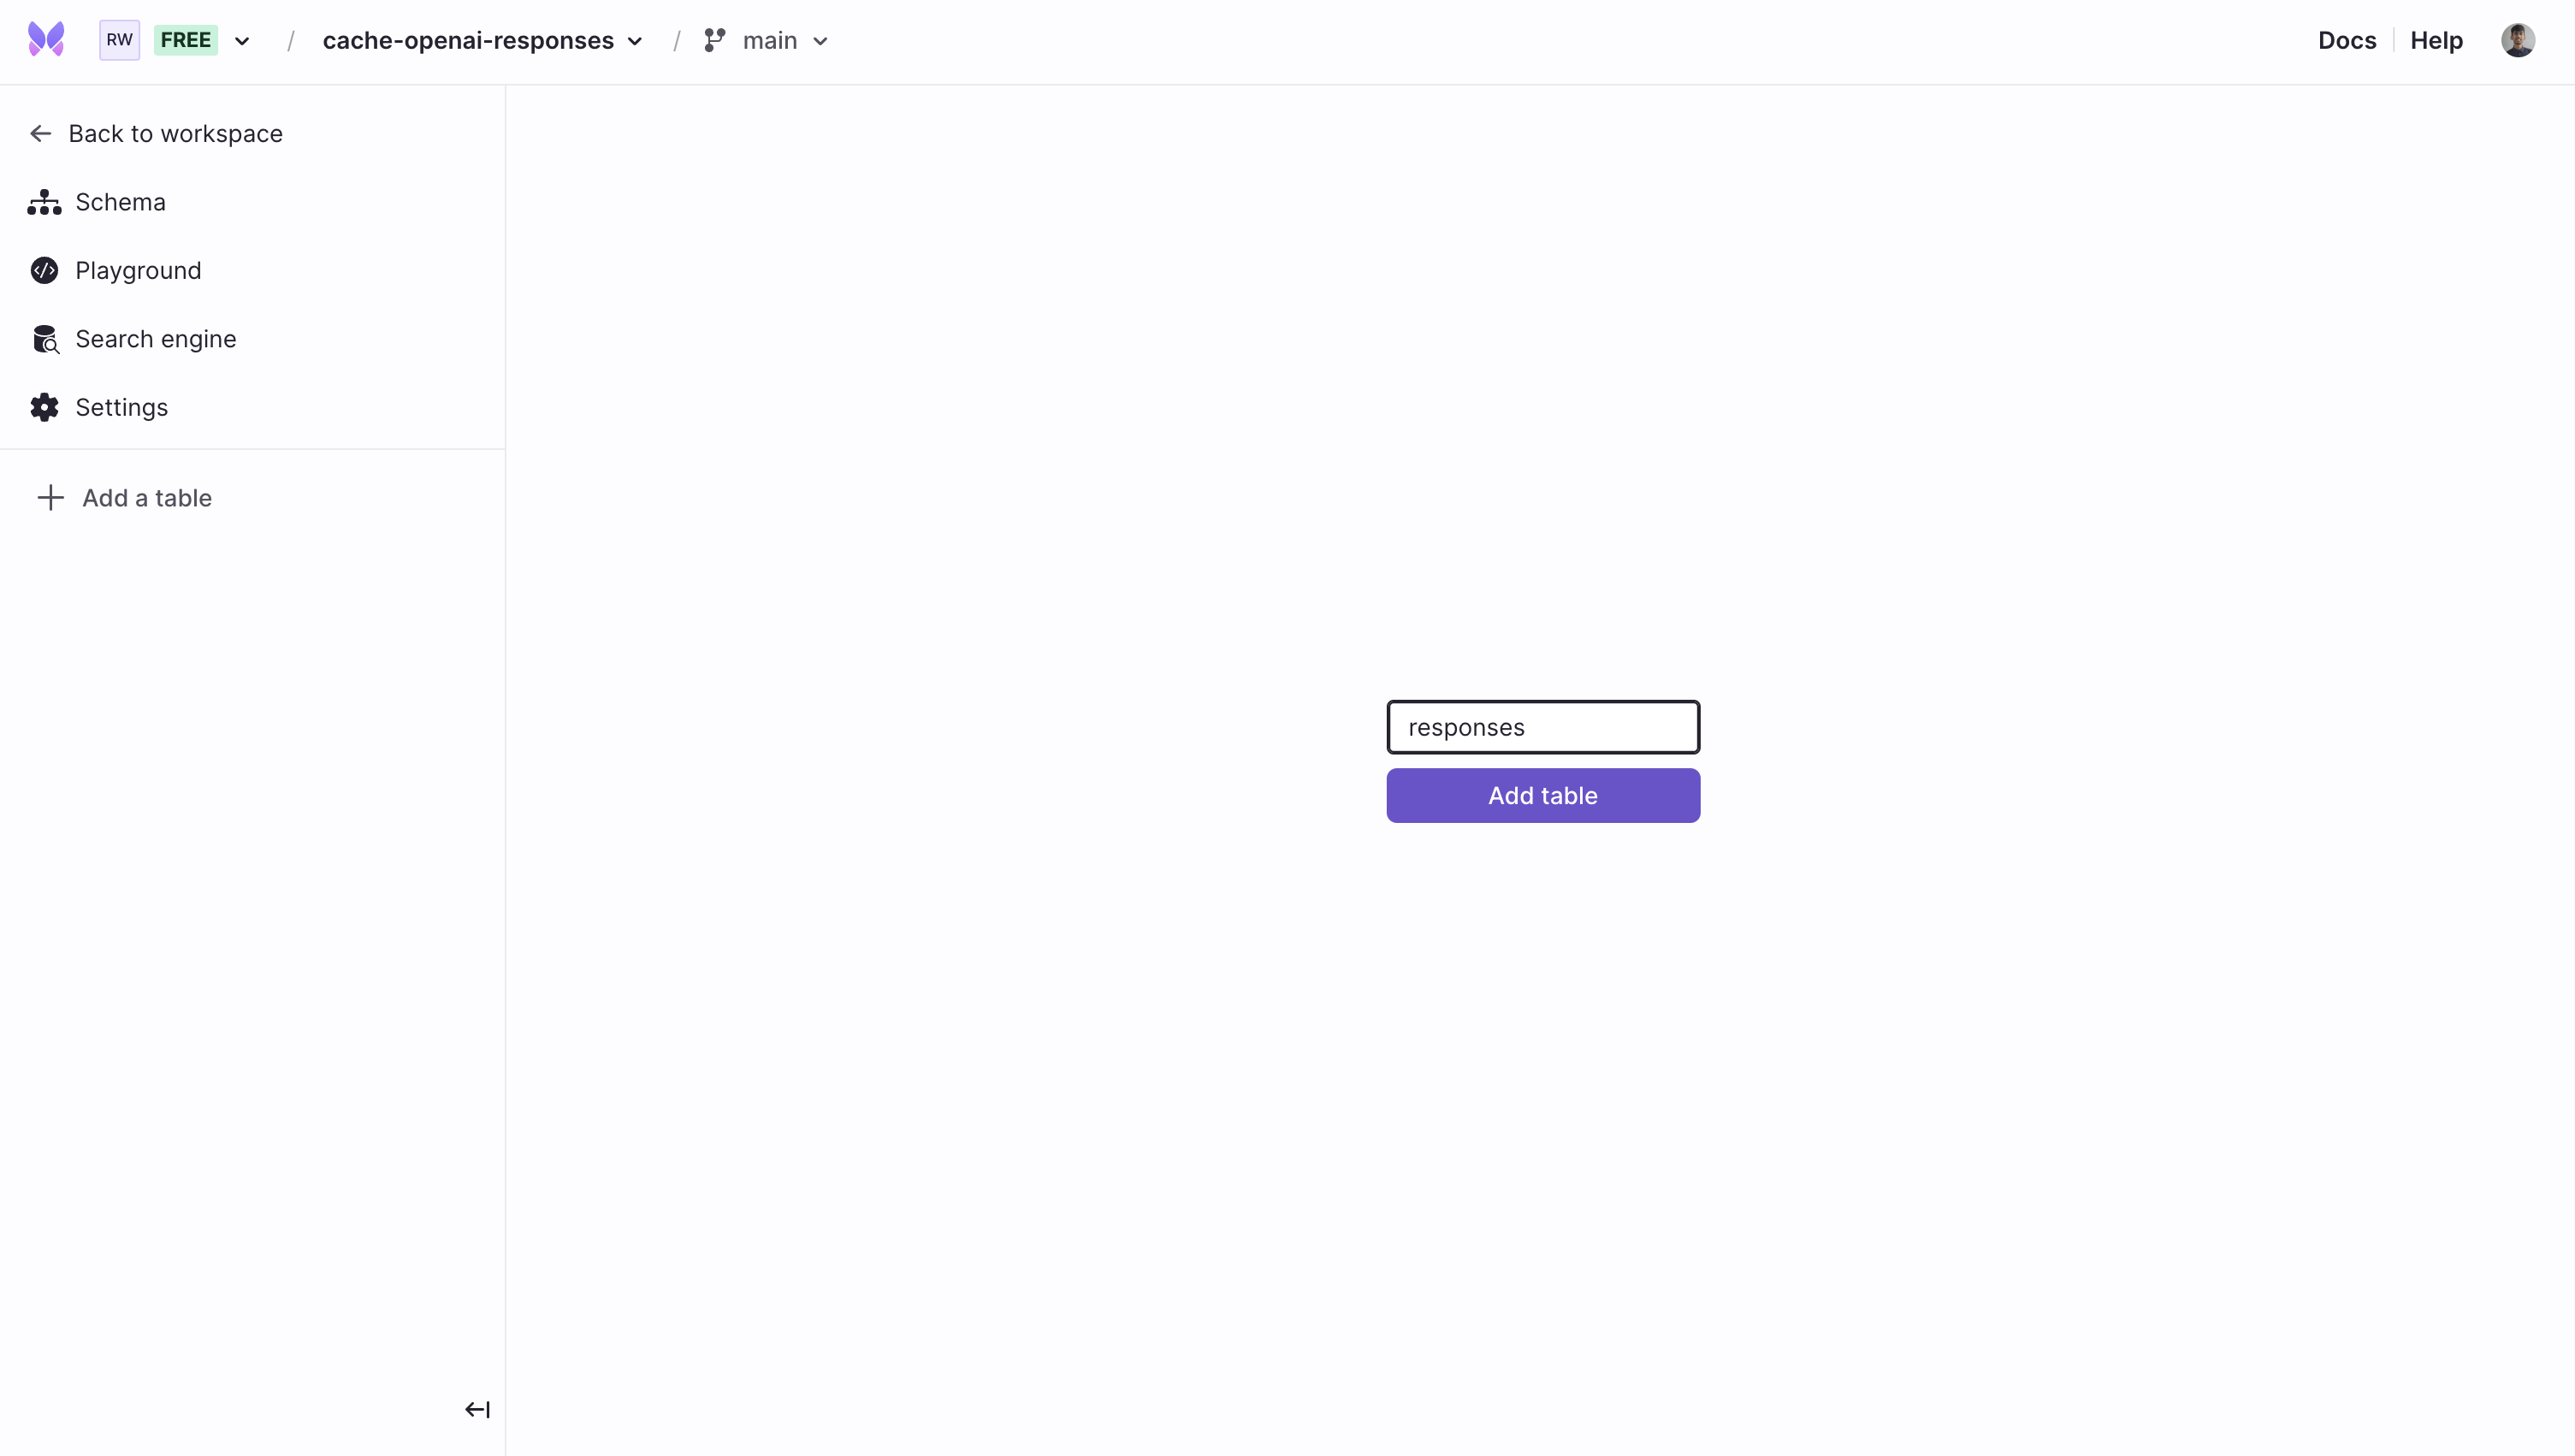
Then, create two tables, named responses and invocations that will maintain the cache of the queries and the responses generated by OpenAI APIs.
Now, let’s move on to integrating Xata in your Express.js application.
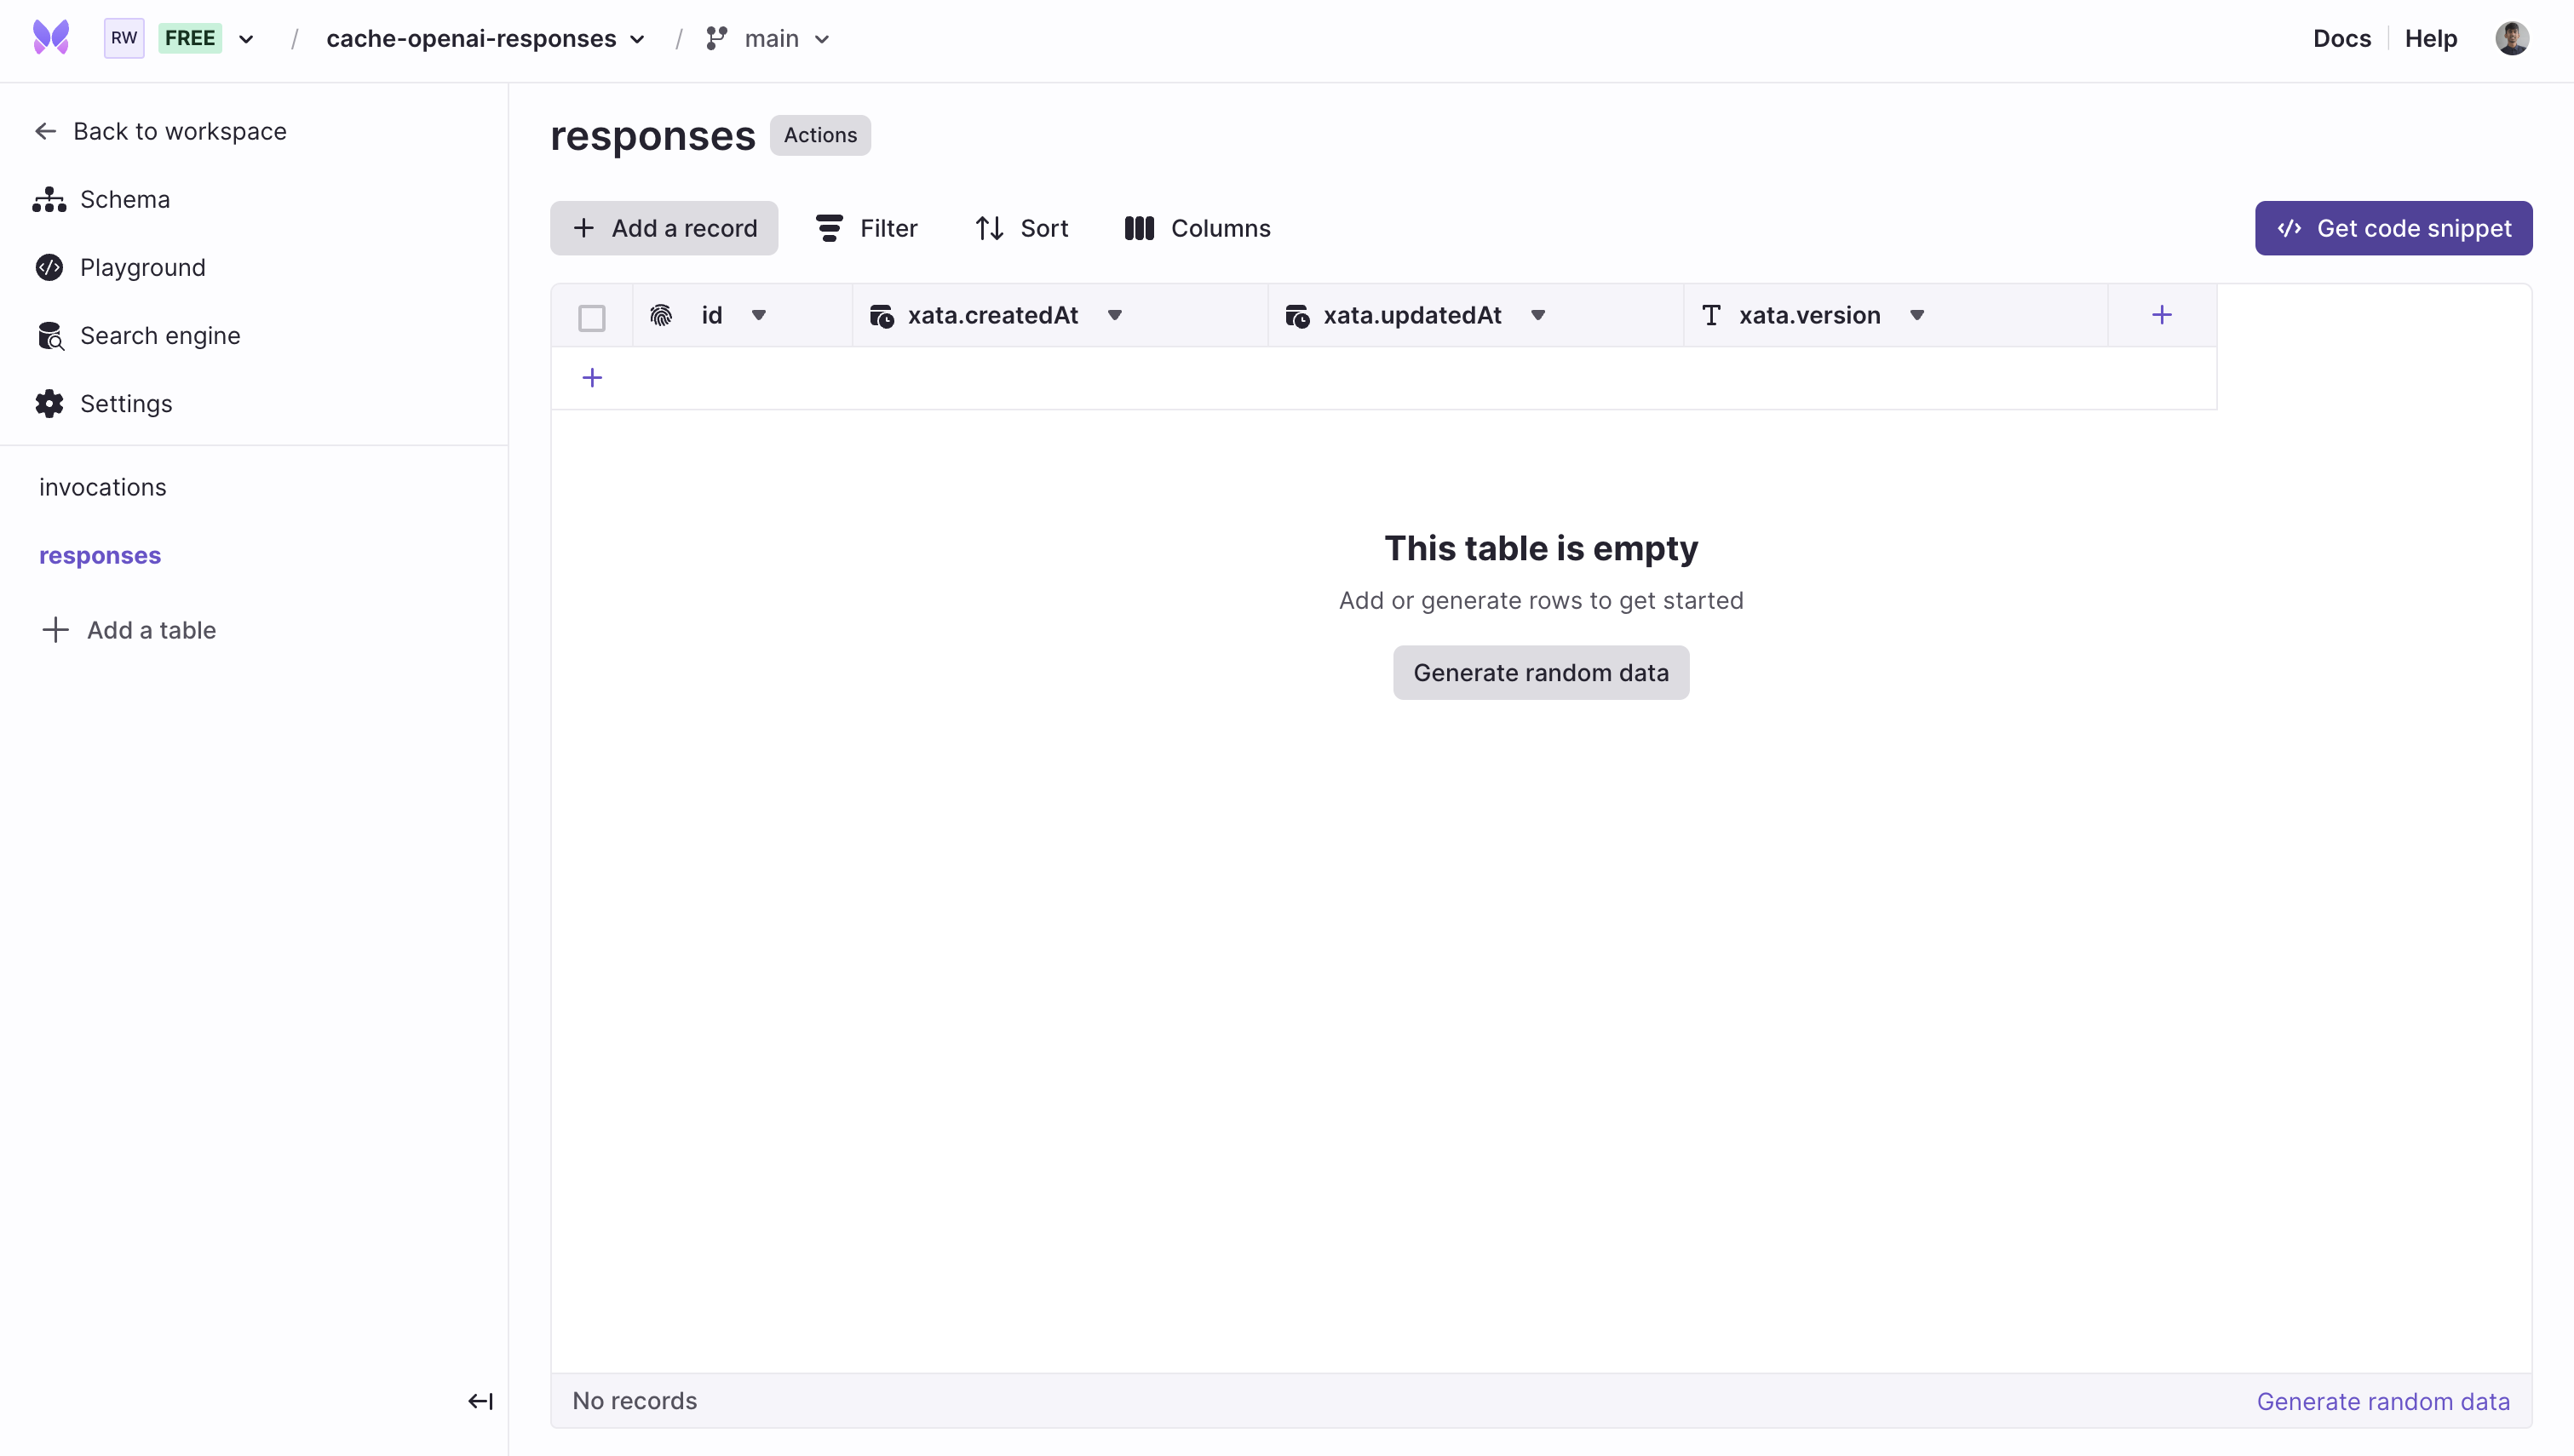
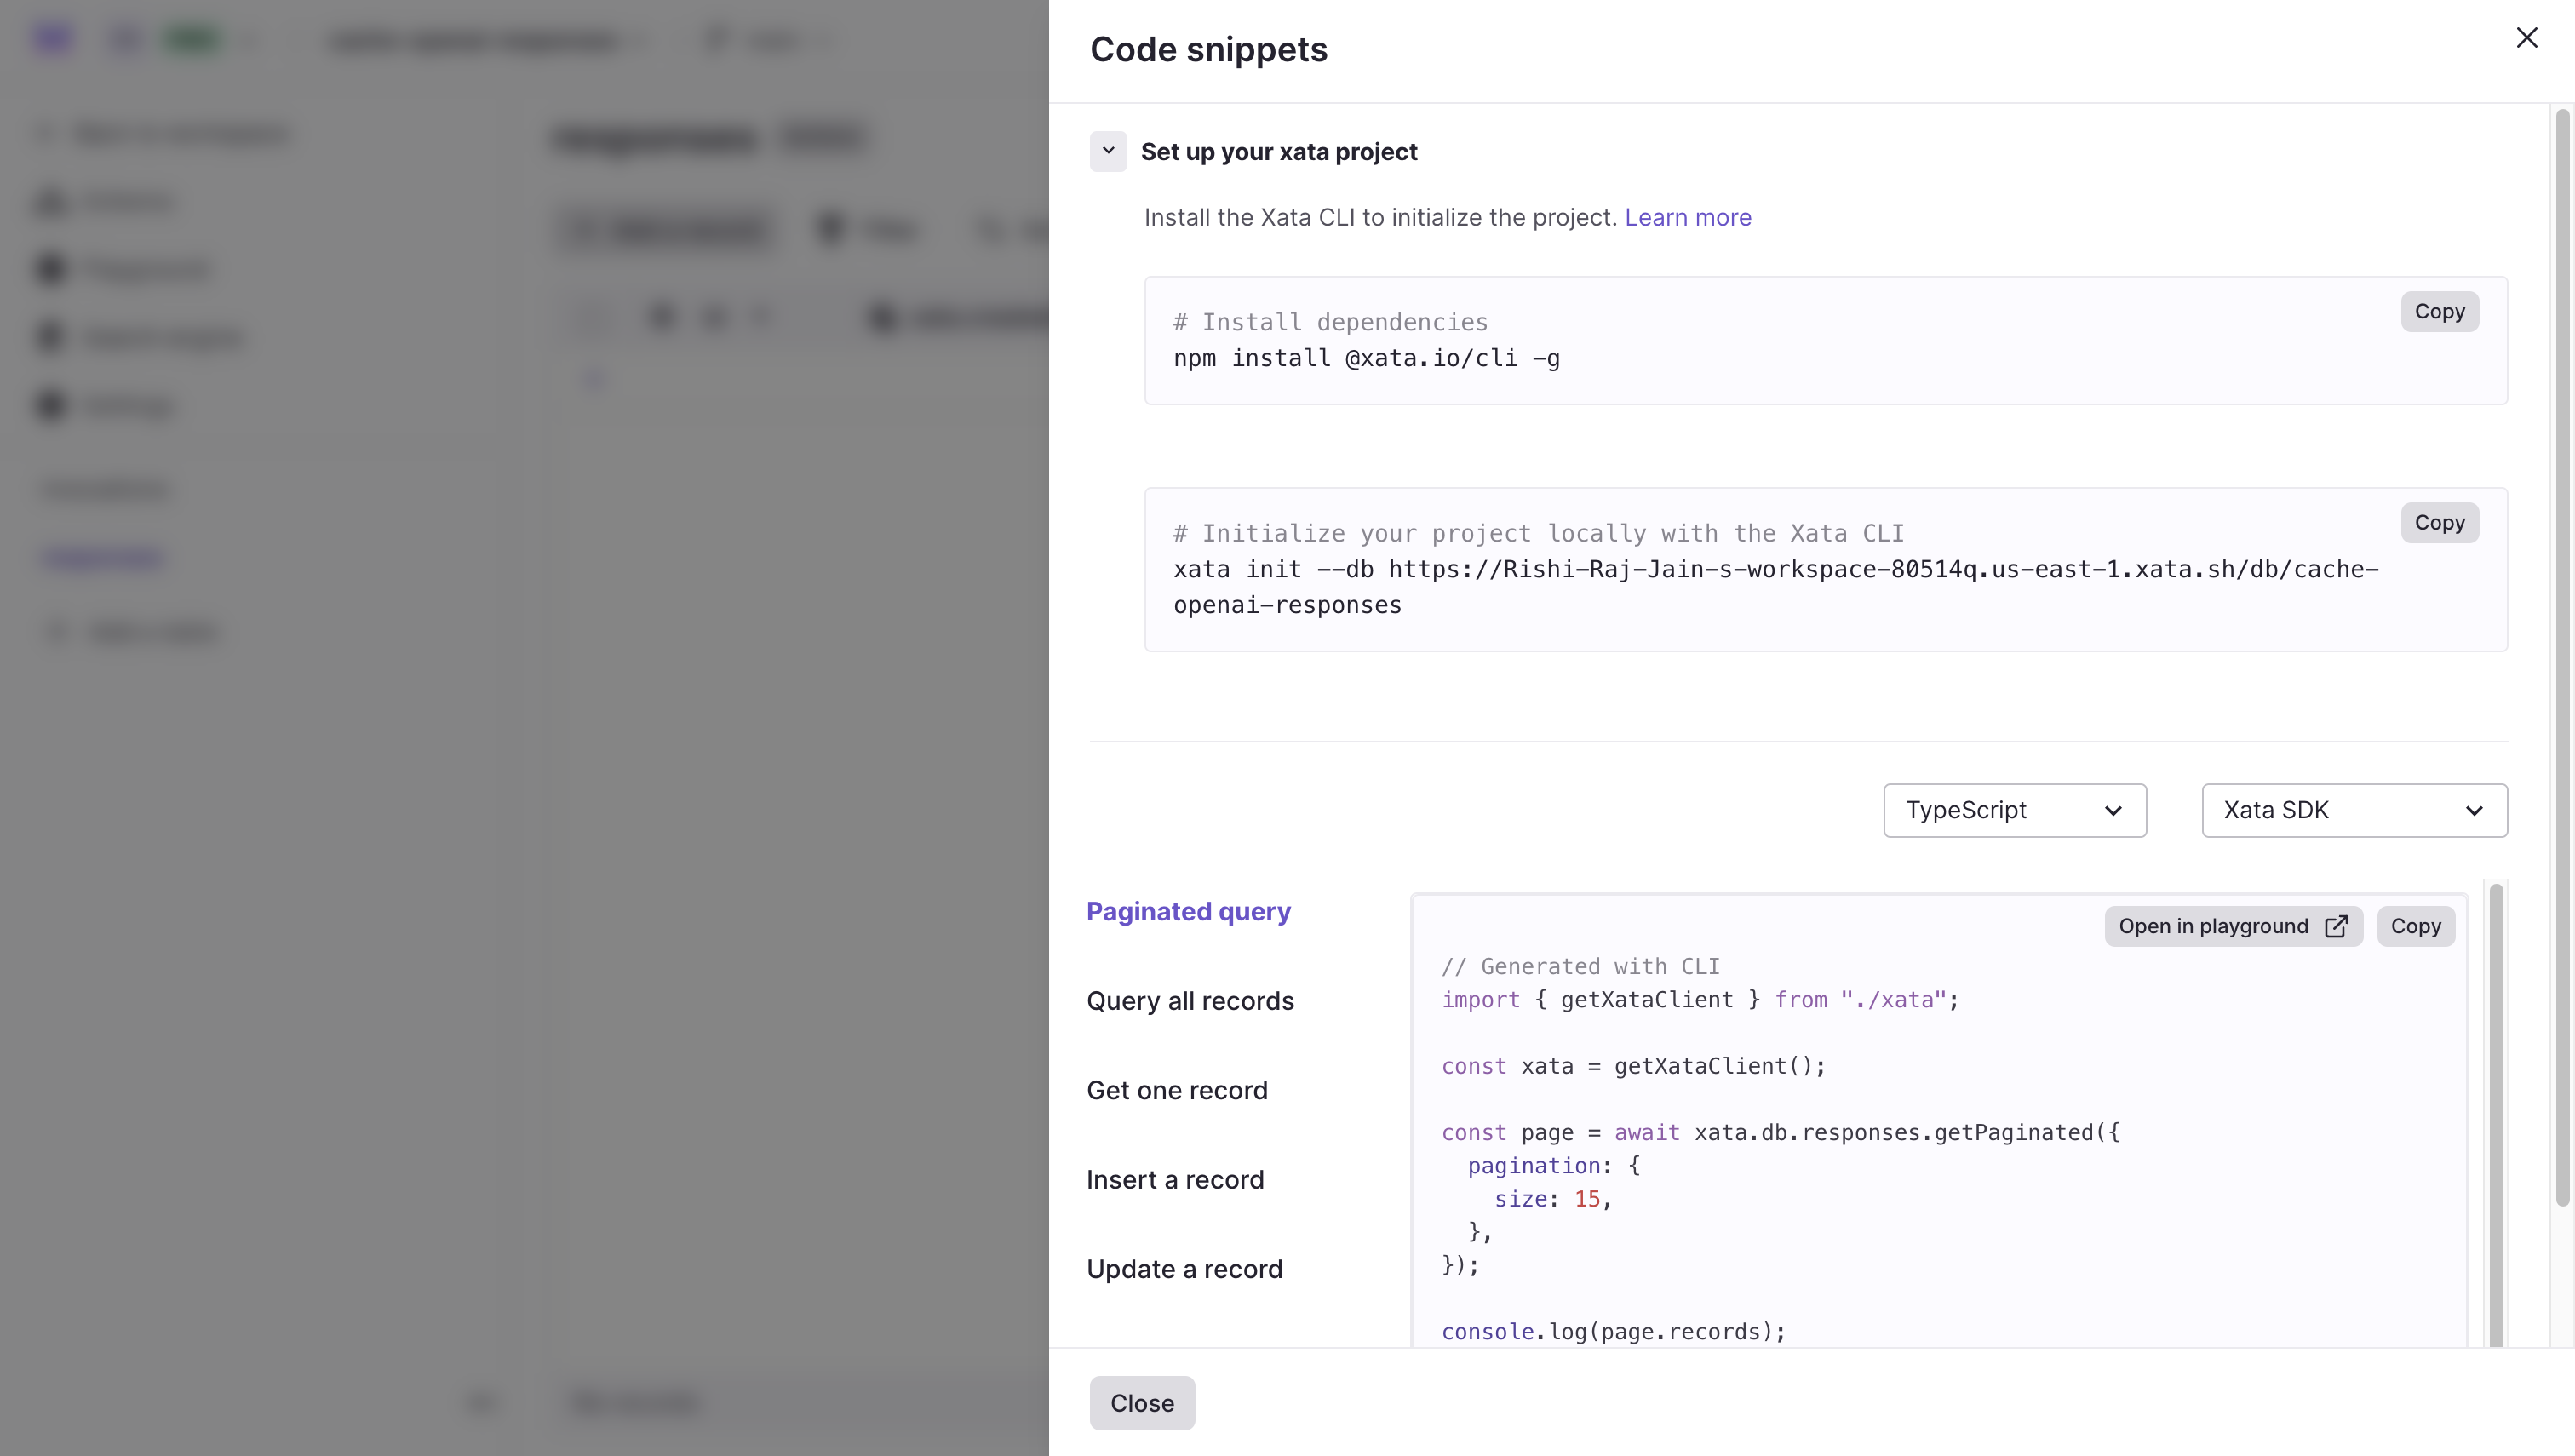
Obtain the Xata initialization command by clicking on a table (say, responses), and then on Get code snippet button.
A modal titled Code snippets is presented which contains a set of commands to integrate Xata into your project, locally.
Next, use the Javascript SDK to interact with your Xata database, by installing the Xata CLI globally using the following command:
# Installs the CLI globally
npm install -g @xata.io/cli
Then, link the Xata project to your Express.js application by executing the following command in your terminal window:
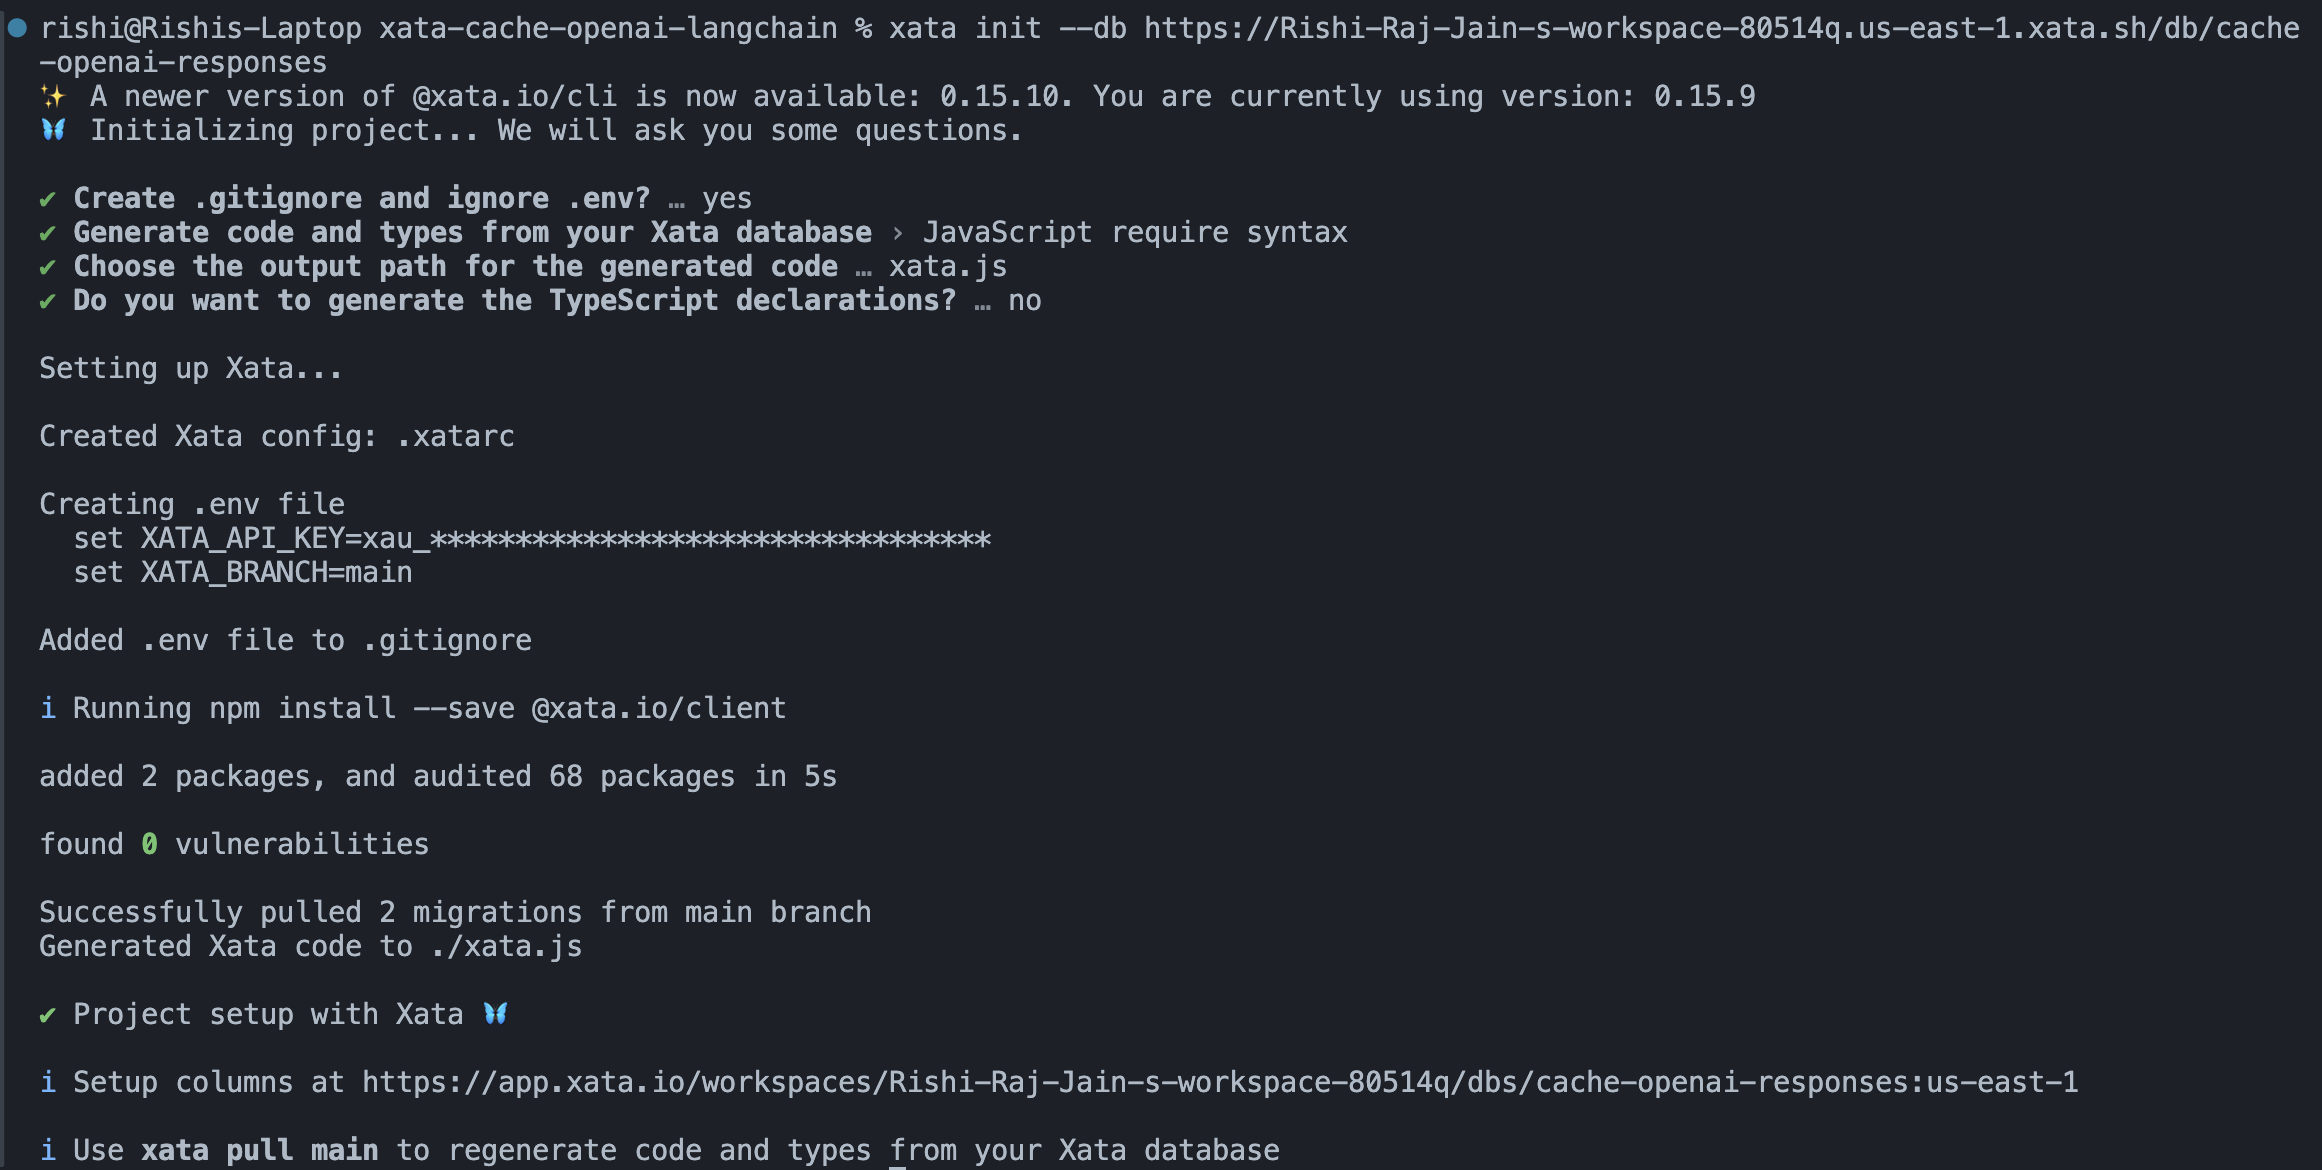
# Initialize your project locally with the Xata CLI
xata init --db https://Rishi-Raj-Jain-s-workspace-80514q.us-east-1.xata.sh/db/cache-openai-responses
Use the following answers to the Xata CLI one-time setup question prompts to integrate Xata with Express.js:
Yeswhen prompted to add.envto.gitignore.JavaScript require syntaxwhen prompted to select the language to generate code and types from your Xata database.xata.jswhen prompted to enter the output path for the generated code by the Xata CLI.Nowhen prompted to generate the TypeScript declarations.
Great! Now, let’s move on to the creating an endpoint that caches ChatOpenAI Responses using Callbacks in LangChain.
Just like any other machine, a Large Language Model (LLM) response to a user query moves across various stages. It is required to start, it is then assigned a task to be done, and it completes the task. LangChain allows you to tap into these (asynchronous) stages while generating Chat responses with Callbacks. Callbacks is a set of handlers that are used to intercept response creation by LLM at each stage. For example, handleLLMStart is called as soon as the chat model starts to process the user prompt. In this section, you’ll learn how to use multiple handlers that allow you specifically perform additional operations when a LLM starts, gets a new token and finishes responding. Let’s create a relevant schema for caching the responses during these stages of the LLM.
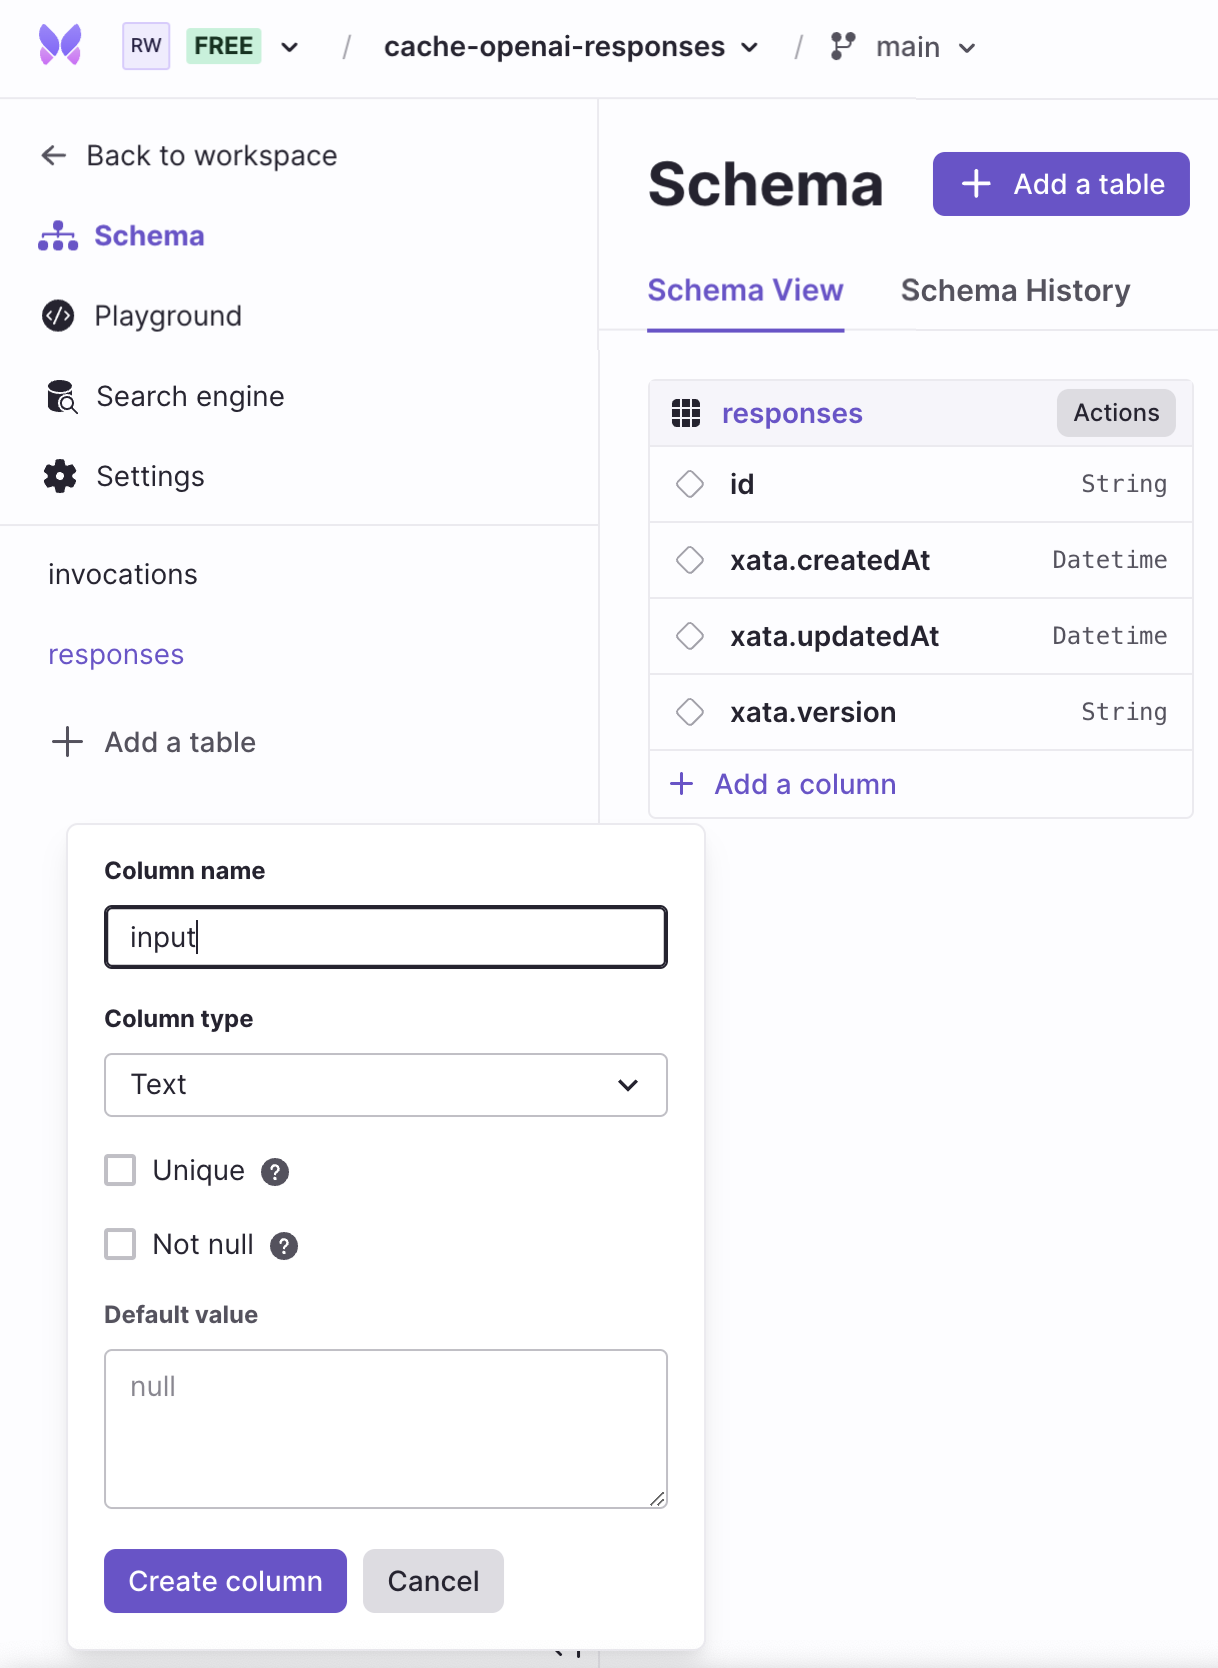
Go to the Schema tab in your Xata database, and update the responses table to have two text fields, named input and answer. To do so, click on + Add a column and select column type as Text. Finally, enter the column name and click Create column.
The xata pull command pulls down schema changes, generates a migration file along with client files that your application may require. Execute the following command to bring in changes from the schema updates we did above:
xata pull mainThis would update files in xata.js and .xata/migrations with the schema changes.
Let’s understand how to use the system of callbacks by LangChain by creating an endpoint query-callback-method which would respond to a user query using the ChatOpenAI LangChain model with callbacks and streaming enabled.
First, install the dependencies required to start using LangChain in your Express.js by executing the following command in your terminal window:
pnpm add @langchain/openai langchainThen, add the following code snippet to the existing index.js file:
// File: index.js

// ...

const { ChatOpenAI } = require('@langchain/openai');

const { ConversationChain } = require('langchain/chains');

// ...

app.post('/query-callback-method', async (req, res) => {
  const { input } = req.body;

  // Set headers before piping the stream
  res.setHeader('Transfer-Encoding', 'chunked');
  res.setHeader('Content-Type', 'text/plain; charset=utf-8');

  const encoder = new TextEncoder();

  const model = new ChatOpenAI({
    streaming: true,
    callbacks: [
      {
        async handleLLMStart() {
          res.write(encoder.encode('[MISS] '));
        },
        handleLLMNewToken(token) {
          res.write(encoder.encode(token));
        },
        async handleLLMEnd(output) {
          // End the response
          res.end();
        }
      }
    ]
  });
  const chain = new ConversationChain({ llm: model });
  await chain.call({ input });
});

// ...
The code above, creates an endpoint /query-callback-method which can be POST-ed to. Then, it destructures input from the request body. Then, it sets the Content-Type and Transfer-Encoding header which indicate creation of a streaming response from this endpoint to the client. Further, it creates a LLM via a ChatOpenAI instance with LangChain using multiple callbacks as follows:
- handleLLMStart: It’s called when the Chat Model begins working on a prompt
- handleLLMNewToken: It’s called whenever the Chat Model in
streamingmode generates a new token while processing a request - handleLLMEnd: It’s called when the Chat Model finishes processing a request to generate its final output
Finally, it creates a single message conversation between the user and AI, and awaits the complete response by AI to the user query.
To save repetitive calls to the OpenAI API that will mount onto your existing cost of running the chat responses, cache the user queries with their responses using Xata. To do so, perform the following additions in your index.js file:
// File: index.js

// ...

+ const { getXataClient } = require("./xata");

// ...

+ // Global Xata Client Instance
+ const xata = getXataClient();

app.post("/query-callback-method", async (req, res) => {
  const { input } = req.body;

  // Set headers before piping the stream
  res.setHeader("Transfer-Encoding", "chunked")
  res.setHeader("Content-Type", "text/plain; charset=utf-8")

  const encoder = new TextEncoder();

  const model = new ChatOpenAI({
    streaming: true,
    callbacks: [
      {
        async handleLLMStart() {
+         // Look for cached response in Xata
+         const cachedResponse = await xata.db.responses
+           .filter({ input })
+           .select(["answer"])
+           .getFirst();

+         // If cached response found, return as is
+         if (cachedResponse) {
+          res.write("[HIT] " + cachedResponse.answer);
+          res.end();
+          return;
+         }
          res.write(encoder.encode("[MISS] "));
        },
        handleLLMNewToken(token) {
          res.write(encoder.encode(token));
        },
        async handleLLMEnd(output) {
+          // Once the response is sent, cache it in Xata
+          await xata.db.responses.create({
+            input,
+            answer: output.generations[0][0].text,
+          });
          // End the response
          res.end();
        },
      },
    ],
  });
  const chain = new ConversationChain({ llm: model });
  await chain.call({ input });
});

// ...
The code above, starts with importing the getXataClient method from the generated xata.js file. Then, it creates a global instance of the Xata client. Further, it updates the LangChain callbacks as follows:
- handleLLMStart: As the LLM starts to respond to the user query, it first looks for a cached response in your Xata database’s
responsestable. This is implemented via the following:
// Look for cached response in Xata
const cachedResponse = await xata.db.responses.filter({ input }).select(['answer']).getFirst();
The code above gets a single row matching the value of input of the user from the responses table in your Xata database.
- handleLLMEnd: As the LLM is about to finish responding to the user query (if the response is not cached), it’ll cache the response in your Xata database using the following code:
// Once the response is sent, cache it in Xata
await xata.db.responses.create({
  input,
  answer: output.generations[0][0].text
});
Great! Now, let’s test if responses are being cached by executing the following command in your terminal:
curl --location 'http://localhost:3005/query-callback-method' \
--header 'Content-Type: application/json' \
--data '{
    "input": "Who are you?"
}'
The output in your terminal window would start with a [MISS] indicating that it’s not a cached response.

Now, execute the above command again to see the following output in your terminal window indicating that it’s a cached response returned from your Xata database.

Awesome! You’re now successfully able to cache responses generated by OpenAI with Xata using LangChain callbacks.
Now, let’s move to learning another way of caching OpenAI responses while using LangChain’s ChatOpenAI model.
In this section, you’ll learn how to use LangChain Caching Layer that allows you to override the implementation of how caches are built and searched for, for a given user query. Let’s create a relevant schema for caching the responses using the LangChain Caching Layer.
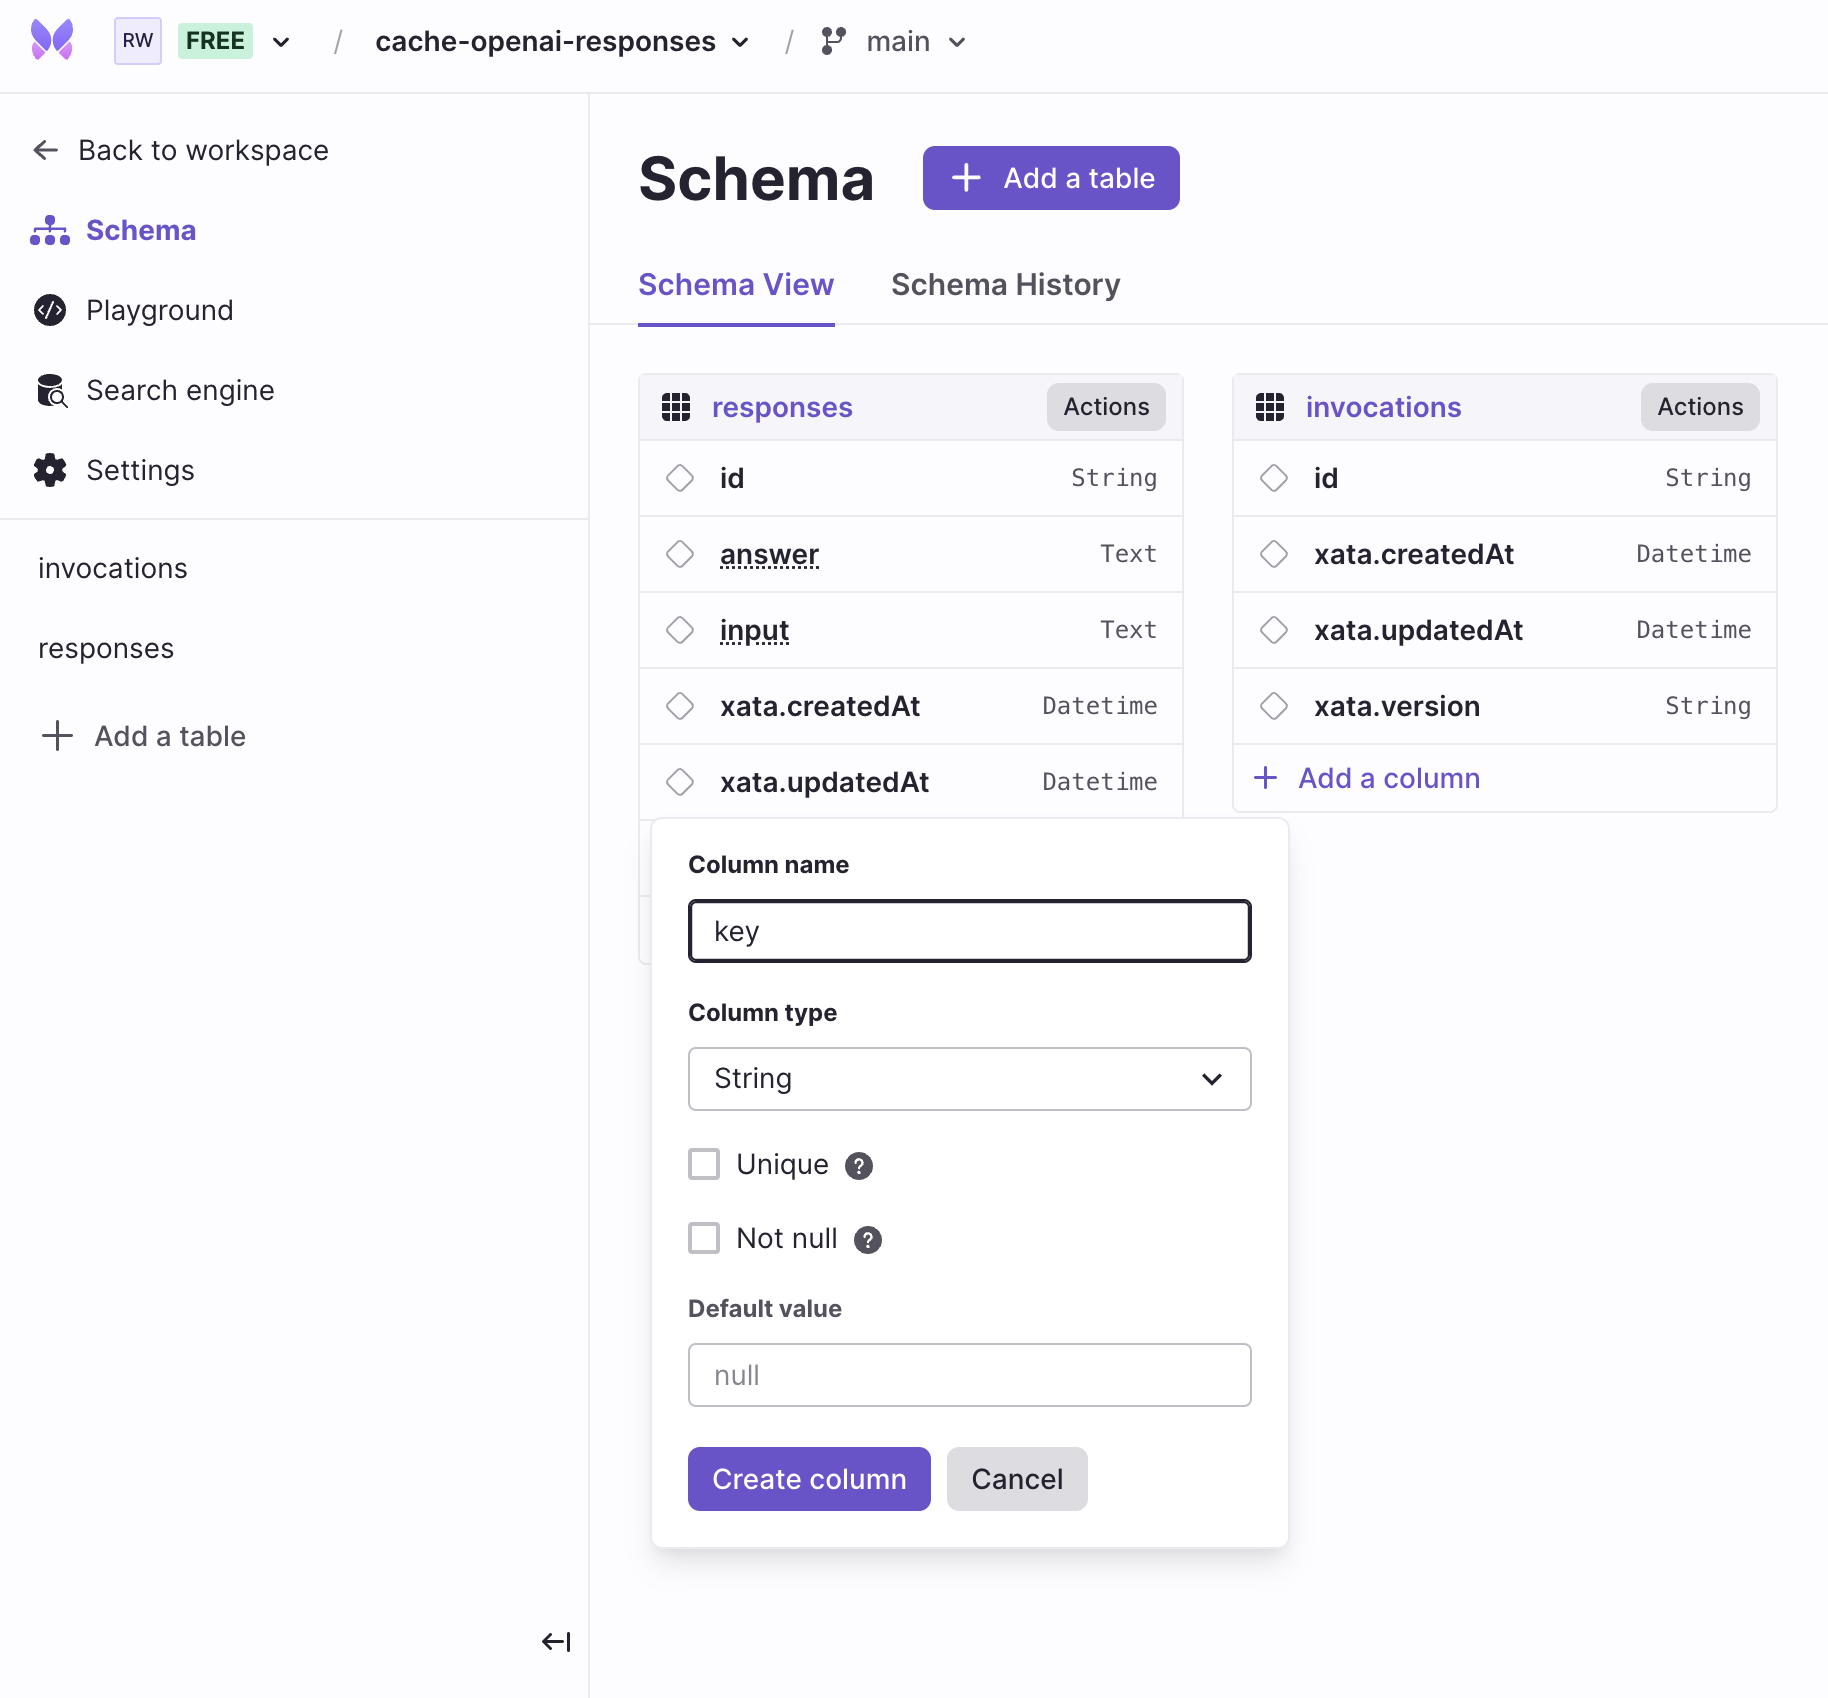
Go to the Schema tab in your Xata database, and update the invocations table to have a String type field named key and a Text field named answer. To do so, click on + Add a column and select column type as String. Finally, enter the column name as key and click Create column. Follow similar steps with the relevant type for creating the answer column.
As you’ve learned earlier, execute the following command to bring in changes from the schema updates we did above into your project locally:
xata pull mainThis would update files in xata.js and .xata/migrations with the schema changes.
Let’s understand how to use the cache layer by LangChain by creating an endpoint query-cache-method which would respond to a user query using the ChatOpenAI LangChain model.
First, install the dependencies required to start using a LangChain cache layer in your Express.js by executing the following command in your terminal window:
pnpm add @langchain/coreEach cache layer in LangChain has two functions:
- lookup: an asynchronous function that looks for responses to the user queries in a data source before generating a fresh response
- update: an asynchronous function that synchronizes the responses by OpenAI to an upstream after generating a fresh response
Let’s start by creating a file named langchain-xata-cache.js that will override the default implementation of these two functions to set the upstream as Xata with the following code:
// File: langchain-xata-cache.js

const { BaseCache, deserializeStoredGeneration, getCacheKey, serializeGeneration } = require('@langchain/core/caches');

class XataCache extends BaseCache {
  // A Xata Client
  xataClient;

  // Constructor for XataCache class
  // Avails xataClient to class methods
  constructor(props) {
    super();
    this.xataClient = props.client;
  }

  // A function to filter and return the
  // cached response of model invocation
  async makeValue(key) {
    const tmp = await this.xataClient.db.invocations.filter({ key }).getFirst();
    if (tmp) return tmp.answer;
  }

  /**
   * Lookup LLM generations in cache by prompt and associated LLM key.
   */
  async lookup(prompt, llmKey) {
    let idx = 0;
    let key = getCacheKey(prompt, llmKey, String(idx));
    let value = await this.makeValue(key);
    const generations = [];
    while (value) {
      generations.push(deserializeStoredGeneration(JSON.parse(value)));
      idx += 1;
      key = getCacheKey(prompt, llmKey, String(idx));
      value = await this.makeValue(key);
    }
    return generations.length > 0 ? generations : null;
  }

  /**
   * Update the cache with the given generations.
   */
  async update(prompt, llmKey, value) {
    for (let i = 0; i < value.length; i += 1) {
      const key = getCacheKey(prompt, llmKey, String(i));
      await this.xataClient.db.invocations.create({
        key,
        answer: JSON.stringify(serializeGeneration(value[i]))
      });
    }
  }
}

exports.XataCache = XataCache;
The code above creates a XataCache class that extends LangChain’s BaseCache class to help override the following two cache functions. Then, it creates a constructor of the class that accepts a Xata instance while a new object is being created. Then, it overrides the lookup function to filter for responses in your Xata database’s invocations table using the makeValue function. Finally, it overrides the update function to cache responses by inserting a record in your Xata database’s invocations table.
To use this cache class, add the following code snippet to the existing index.js file to create an endpoint /query-cache-method:
// File: index.js

// ...

// XataCache class built on top of LangChain's BaseCache
const { XataCache } = require('./langchain-xata-cache.js');

const { ChatOpenAI } = require('@langchain/openai');

const { getXataClient } = require('./xata');

// Global Xata Client Instance
const xata = getXataClient();

// ...

app.post('/query-cache-method', async (req, res) => {
  const { input } = req.body;

  // Use LangChain Xata Cache Adapter
  const model = new ChatOpenAI({
    cache: new XataCache({ client: xata })
  });

  console.time();

  // Perform a cached-response first AI model invocation
  const response = await model.invoke(input);

  console.timeEnd();

  res.write(response.content);
  res.end();
});

// ...
The code above, starts with importing the XataCache class that we created earlier. Then, it creates an endpoint /query-cache-method which can be POST-ed to. Then, it destructures input from the request body. Then, it creates a LLM via a ChatOpenAI instance with LangChain. The cache property of the ChatOpenAI model is set to a new instance of XataCache using the existing global Xata client. Then, it invokes the model to respond to the user query. Finally, the content of the response by OpenAI is returned to the user.
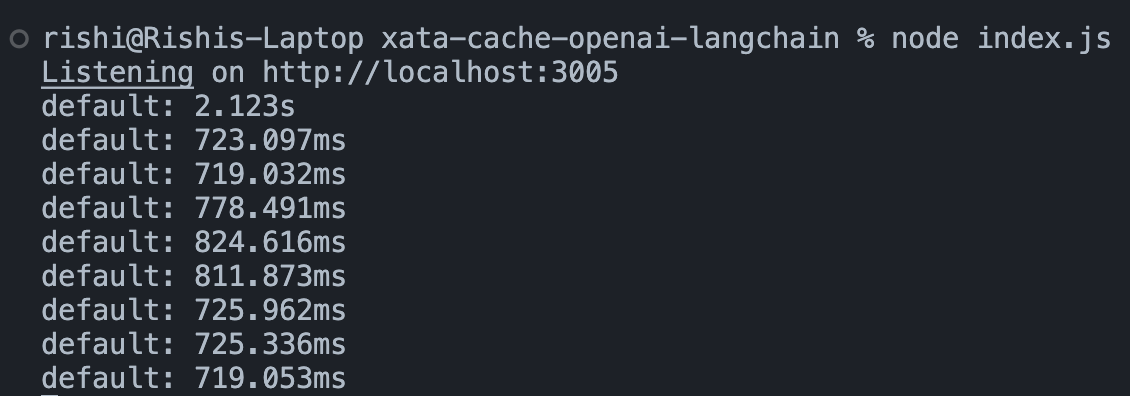
Great! Now, let’s test if responses are being cached by executing the following command in your terminal:
for i in {1..9}; do
    curl --location 'http://localhost:3005/query-cache-method' \
    --header 'Content-Type: application/json' \
    --data '{
        "input": "Who are you?"
    }'
    echo "Execution $i completed."
done
The output in your terminal window would indicate the time (approximately) it took to respond to the user queries. An immediate decrease in the response times after the very first one indicates cached responses being returned for the user queries.
Awesome! You’re now successfully able to cache responses generated by OpenAI with Xata using the LangChain Caching Layer.
In this guide, you learned different ways of caching OpenAI API responses using LangChain callbacks and the caching layer. Using Xata, you’re able to interact with a Postgres serverless database to build a set of cache OpenAI API responses, and utilize Xata’s search capabilities to respond to user queries faster using those cache responses.
For more detailed insights, explore the references cited in this post.
| Resource | Link |
|---|---|
| GitHub Repo | https://github.com/rishi-raj-jain/xata-cache-openai-langchain |
| Caching - LangChain Chat Models | https://js.langchain.com/docs/modules/model\_io/chat/caching |
| Callbacks - LangChain Modules | https://js.langchain.com/docs/modules/callbacks/ |
We'd love to hear from you if you have any feedback on this guide, would like to know more about Xata, or if you'd like to contribute a community blog or tutorial. Reach out to us on Discord or join us on X | Twitter. Happy building 🦋
Start free,
pay as you grow
Xata provides the best free plan in the industry. It is production ready by default and doesn't pause or cool-down. Take your time to build your business and upgrade when you're ready to scale.
- Single team member
- 10 database branches
- High availability
- 15 GB data storage
- Single team member
- 10 database branches
- High availability
- 15 GB data storage
Copyright © 2025 Xatabase Inc.
All rights reserved.